Navigating Guitar Tablature: A Guide to Common Notation Conventions

For guitarists, whether beginners or experienced players, tablature (or tabs) is an invaluable tool for learning and playing music on the guitar. Unlike traditional sheet music, which uses standard notation, guitar tabs provide a simplified and guitar-specific method of notation. While tabs are relatively straightforward, there are common notation conventions within them that are important to understand. In this comprehensive guide, we’ll navigate the world of guitar tablature, shedding light on the common notation conventions and helping you become a more proficient tab reader and player.

The Basics of Guitar Tabs

Before delving into common notation conventions, let’s briefly touch on the foundational elements of guitar tabs:

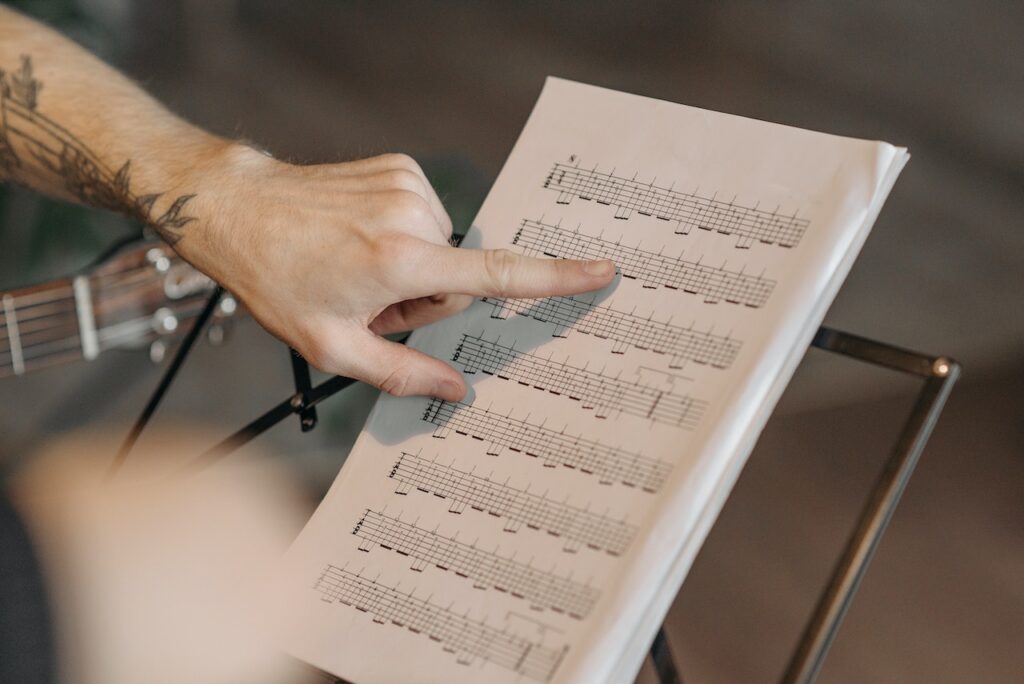
  1. The Staff: A typical guitar tab consists of a set of horizontal lines, representing the guitar strings. These lines can range from four to seven, but the most common tablature has six lines, one for each string of the standard-tuned guitar.
  2. Numbers: Numbers placed on the lines indicate which fret to press and play on the respective string. “0” often represents an open string, while other numbers guide you to frets.
  3. String Indications: The order of the lines, from top to bottom, represents the strings of the guitar, starting with the high E string at the top and the low E string at the bottom.

Now, let’s explore the common notation conventions in greater detail.

1. Repeats and Endings

Guitar tabs often feature repeat signs that indicate specific sections of a song should be played more than once. The most common symbols for repeats are “||” (double bar lines), “:[number]” (indicating how many times to repeat), and “|:” (beginning of a repeated section). At the end of the repeated part, you’ll find “:|” (end of a repeated section).

2. Time Signatures

While less common in guitar tabs than in sheet music, you may come across time signatures. These are written as a fraction (e.g., 4/4) and provide information about the song’s timing and rhythm.

3. Chord Diagrams

In tabs, chord diagrams are used to indicate chords to be played at specific points in the song. They consist of a grid with dots, which represent finger positions on the fretboard. Learning to read chord diagrams is essential for playing chord progressions accurately.

4. Slides, Bends, and Other Techniques

Tabs use various symbols to represent different guitar techniques:

  • Slides: Slides are depicted with a diagonal line connecting two notes. They signify that you should slide your finger from one fret to another without lifting it off the string.
  • Bends: Bends are indicated by an upward arrow, a “b,” or the abbreviation “½” (for a half-step bend). These symbols show that you should bend the string at a specific fret to raise its pitch.
  • Hammer-ons and Pull-offs: These techniques are usually shown with curved lines connecting two notes. A hammer-on indicates that you should play a note and then tap your finger on the next fret, while a pull-off indicates you should lift your finger off the string to sound the next note.
  • Vibrato: Vibrato is represented by a wavy line or the letter “v” above a note, indicating that you should apply vibrato to that note.

5. Palm Muting

Palm muting is commonly used in rock and metal music. In tabs, it’s denoted by the letter “P” above the note you should palm mute. To execute a palm mute, lightly rest the palm of your hand on the strings near the bridge while picking the note.

6. Dynamics and Articulations

While guitar tabs are less detailed than sheet music, they sometimes include dynamic and articulation symbols. Common symbols include “p” (soft or quiet), “f” (loud), “s” (slap), and “h” (harmonic). These symbols provide some guidance on how to play certain notes.

7. Grace Notes

Grace notes, or small decorative notes, are sometimes used in tabs. They are typically smaller and not connected to the main notes. Grace notes are usually played quickly and add embellishments to the music.

8. Barre Chords and Capo Notations

Tabs may include indications for using barre chords or capos. Barre chords are depicted with a curved line over the fret number to show that you should bar all the strings at that fret. Capo notations indicate the fret at which a capo should be placed.

9. Fingerpicking Patterns

For fingerstyle guitarists, fingerpicking patterns may be notated in tabs. These patterns show which fingers to use on which strings.

10. Left-Hand and Right-Hand Fingerings

In more advanced tabs, you might encounter left-hand (fretting hand) and right-hand (picking hand) fingerings. These indicate which fingers to use on the fretboard and picking pattern details.

Now that we’ve explored these common notation conventions in guitar tabs, let’s discuss why they are essential and how they can help you become a better guitarist.

The Importance of Understanding Common Notation Conventions in Tabs

  1. Accuracy: Accurate interpretation of notation conventions ensures you play the right notes and execute techniques correctly.
  2. Communication: Tabs often use notation conventions to convey specific instructions. Knowing how to read and understand them is crucial for effective communication.
  3. Expressiveness: Understanding articulation, dynamics, and techniques allows you to infuse your playing with expression and emotion.
  4. Versatility: Proficiency in reading tabs with various notation conventions makes you a more versatile guitarist, capable of playing a wide range of music styles.
  5. Collaboration: When playing with other musicians, knowing notation conventions helps you follow and communicate musical ideas effectively.

How to Improve Your Tab Reading Skills

  1. Practice Regularly: The more you read and play tabs, the more familiar you’ll become with common notation conventions.
  2. Listen Actively: Use your ear to listen to the song you’re playing along with. It will help you understand the rhythm and dynamics even when they’re not explicitly notated.
  3. Study Specific Techniques: If you’re struggling with certain techniques (e.g., slides or bends), find resources and tutorials that focus on those techniques to improve your skills.
  4. Play Along with Music: Practicing along with the actual song can help you get a sense of how the tab’s notation conventions align with the music.
  5. Transcribe Music: Try transcribing songs you like from recordings into tabs. This exercise will strengthen your ear and tab reading skills.
source: youtube.com/@rainydaystudio77

Navigating guitar tablature is an essential skill for any guitarist. While tabs are generally easier to read than traditional sheet music, understanding common notation conventions within them is critical for precise and expressive playing. By mastering these conventions, you can expand your repertoire, communicate effectively with other musicians, and bring a new level of expression to your guitar playing. Practice regularly, actively listen to music, and seek out resources to improve your tab reading skills, and you’ll find that the world of guitar tabs becomes a rich and accessible resource for your musical journey.

Chord Diagrams in Guitar Tabs: Essential Tools for Guitarists

Guitar playing is an art that encompasses a wide range of styles, techniques, and skills. As you embark on your journey to become a skilled guitarist, one essential tool you’ll encounter in your repertoire is the chord diagram within guitar tabs. Chord diagrams are visual representations of specific chords and are invaluable for any guitarist, whether you’re a beginner or a seasoned pro. In this comprehensive guide, we will explore the importance and utility of chord diagrams in guitar tabs, helping you understand their significance and how to make the most of them.

The Basics of Guitar Tabs

Before diving into chord diagrams, it’s important to understand the basics of guitar tabs. Guitar tablature, commonly known as “tabs,” is a form of musical notation specific to the guitar. It utilizes a system of lines to represent the strings of the guitar, with numbers indicating the frets where you should place your fingers.

For instance, when you see a “0” on the high E string (the thinnest string), it means to play the open string without pressing down any frets. On the other hand, if you see a “3” on the same string, it instructs you to place your finger on the third fret of the high E string. This system is fantastic for indicating individual notes and melodies, but it doesn’t tell you much about chords.

What Are Chord Diagrams in Guitar Tabs?

Chord diagrams, often found in guitar tabs, are visual representations of guitar chords. They offer a clear and concise way of illustrating how to play a specific chord on the guitar. Chord diagrams consist of a grid, with vertical lines representing the guitar strings and horizontal lines indicating the frets. Dots or numbers within this grid reveal where you should place your fingers to form the chord.

The Significance of Chord Diagrams

Chord diagrams are essential tools for guitarists for several reasons:

  1. Quick Reference: Chord diagrams provide an immediate reference for how to play a chord. Instead of reading through a chord’s note-by-note tab, you can quickly grasp the fingering positions.
  2. Chord Voicings: Chord diagrams depict different voicings or variations of a chord. This allows you to choose the voicing that best fits the song or your playing style.
  3. Chord Progressions: Chord diagrams can help you see and understand chord progressions more easily. They enable you to transition from one chord to another efficiently.
  4. Song Learning: When learning a new song, having the chord diagrams alongside the tab can streamline the learning process. You can see the chords you’ll be using and easily incorporate them into your playing.
  5. Playing with Others: Chord diagrams are particularly helpful when playing with others. They ensure that everyone is on the same page regarding which chords are being used in a song.

How to Read Chord Diagrams

Understanding and reading chord diagrams is relatively straightforward. Let’s break down the key components:

  1. The Grid: The grid represents the fretboard. The vertical lines represent the strings, with the leftmost line typically representing the low E string, and the rightmost line representing the high E string. The horizontal lines denote the frets.
  2. Dots or Numbers: Inside the grid, you’ll find dots or numbers. These indicate where to place your fingers. A “0” or an “X” means that you don’t press down on that string. A number corresponds to the fret where you should place your finger.
  3. Numbers on Strings: Sometimes, chord diagrams also include numbers below the grid, representing the fingers you should use for each string. Typically, “1” is the index finger, “2” is the middle finger, “3” is the ring finger, and “4” is the pinky.

Making the Most of Chord Diagrams

To effectively use chord diagrams in guitar tabs, consider the following tips:

  1. Learn the Basics: Understand the basics of chord construction. Know how to read the chord name, the fingering, and the positioning on the fretboard.
  2. Practice Transitioning: Work on transitioning between chords smoothly. Focus on changing from one chord to another in the context of a song.
  3. Use Online Resources: There are many online resources that provide chord diagrams for a wide range of songs. These resources are invaluable for learning new songs and expanding your chord vocabulary.
  4. Experiment with Voicings: Chord diagrams offer multiple voicings for the same chord. Experiment with different voicings to find the one that suits your playing style or the song you’re working on.
  5. Integrate with Tabs: Often, you’ll find tabs and chord diagrams in the same song sheet. Learn to read and use both simultaneously to get a more complete picture of the music.
source: youtube.com/@RedlightBlue

Chord diagrams in guitar tabs are indispensable tools for guitarists of all levels. They provide a clear and concise way to understand and play chords, making them a vital resource for learning songs, creating your music, and playing with others. By mastering the art of reading and using chord diagrams, you’ll enhance your guitar-playing skills and open up new musical possibilities.

The Language of Guitar Tabs: Understanding the Meaning Behind the Numbers and Symbols

If you are a guitarist, chances are you have come across guitar tabs (tablature) at some point in your musical journey. Guitar tabs are a form of notation used to represent how to play a piece of music on the guitar. They use a combination of numbers, symbols, and letters to indicate which strings to play and where to place your fingers on the fretboard.

If you are new to guitar tabs, the symbols and numbers may seem confusing at first glance. But with a bit of practice, you can quickly learn to decode the language of guitar tabs. In this article, we will guide you through the basics of understanding the meaning behind the numbers and symbols used in guitar tabs.

The Numbers

The numbers used in guitar tabs indicate which fret to press down on a particular string. For example, the number 1 indicates the first fret, while the number 2 indicates the second fret, and so on. The number 0 indicates an open string, meaning you play the string without pressing down on any fret.

When you see multiple numbers stacked vertically, it means you need to play a chord. Each number represents the fret number you need to press down on a particular string to create the chord. For example, if you see the numbers 1, 2, and 3 stacked vertically on a string, it means you need to press down on the first, second, and third frets of that string simultaneously.

The Symbols

In addition to numbers, guitar tabs also use various symbols to indicate how to play a particular note. Here are some of the most common symbols used in guitar tabs:

  • Hammer-on: A hammer-on is indicated by a curved line connecting two notes. It means you need to play the first note and then hammer your finger onto the next fret without picking the string again.
  • Pull-off: A pull-off is the opposite of a hammer-on and is indicated by a curved line connecting two notes. It means you need to play the first note and then pull your finger off the fretboard to produce the second note.
  • Slide: A slide is indicated by a line connecting two notes, and it means you need to slide your finger along the fretboard from the first note to the second note without picking the string again.
  • Bend: A bend is indicated by an upward arrow and a number indicating how far to bend the string. It means you need to press down on the string and bend it up to the indicated pitch.
  • Vibrato: Vibrato is indicated by a wavy line above the note, and it means you need to oscillate your finger back and forth on the fret to create a vibrating sound.
  • Palm mute: A palm mute is indicated by the letter “P” above the note. It means you need to place the fleshy part of your palm on the strings near the bridge to mute the sound while picking the note.

Understanding these symbols is crucial to interpreting guitar tabs accurately. By mastering the different symbols used in guitar tabs, you can add dynamics and nuances to your playing that are not easily conveyed in standard notation.

source: youtube.com/@GuitarTricks

Guitar tabs are a powerful tool for learning and playing music on the guitar. Understanding the meaning behind the numbers and symbols used in guitar tabs is essential for decoding them accurately. By mastering the language of guitar tabs, you can open up a whole new world of music and take your playing to the next level.

Guitar Tabs Explained: Understanding the Different Parts and Their Significance

Guitar tabs, also known as tablature, have become a popular and efficient way for guitarists to learn and play their favorite songs. A guitar tab is essentially a visual representation of the fretboard, where numbers and symbols indicate which strings and frets to play. To fully understand how to read guitar tabs, it’s important to be familiar with its different parts and their significance. In this article, we’ll explore the different parts of a guitar tab and how they work.

Staff

The staff is where the guitar tab is written. It’s usually composed of six horizontal lines representing the six strings of the guitar. The line at the bottom represents the low E string while the top line represents the high E string. Each line represents a specific string and the numbers written on the lines indicate the frets to be played on that particular string.

Numbers

The numbers on the staff indicate the fret number to be played on a specific string. For example, if a “2” is written on the second line from the bottom, it means that you need to fret the second fret on the E string.

Symbols

Aside from numbers, guitar tabs also use symbols to indicate specific techniques or playing styles. Some of the most common symbols include:

  • Hammer-ons: represented by a curved line connecting two numbers, it means that you should hammer-on the string from the first fret to the second fret without picking it again.
  • Pull-offs: represented by a curved line with a small “p” above it, it means that you should pull off the string from the second fret to the first fret without picking it again.
  • Slides: represented by a diagonal line connecting two numbers, it means that you should slide your finger from the first fret to the second fret or from the second fret to the fourth fret, for example.
  • Bend: represented by an upward arrow or the letter “b,” it means that you should bend the string at a certain fret to create a pitch change.
  • Vibrato: represented by a wavy line, it means that you should slightly and quickly bend and release the string at a certain fret to create a vibrato effect.

Repeat Signs

Repeat signs are used to indicate that a specific section of the music should be repeated. The most common repeat sign is the double bar line with two dots on either side. This means that you should repeat the section of music between these two lines.

Chords

Chords are often written above the staff to indicate the chords that should be played during a specific section of the song. They are usually written as letters, such as “G” or “C,” and sometimes accompanied by additional symbols to indicate variations or embellishments.

source: youtube.com/@justinguitar

Understanding these different parts of a guitar tab is crucial to effectively read and play music. By paying attention to the staff, numbers, symbols, repeat signs, and chords, you’ll be able to accurately recreate your favorite songs on the guitar. With practice and dedication, reading guitar tabs will become second nature and you’ll be able to expand your repertoire of songs to play.

A Beginner’s Guide to Reading Guitar Tablature

Tablature, or “tab,” is a popular way for guitarists to notate music. Unlike traditional sheet music, which shows the notes and rhythms of a song, tablature uses a series of numbers and symbols to represent the strings and frets on the guitar. While it may seem intimidating at first, learning how to read guitar tablature is an essential skill for any guitarist. In this beginner’s guide, we’ll cover the basics of reading tab and provide some helpful tips to get you started.

Understanding Tablature Symbols

Before we dive into how to read tablature, let’s first go over some common symbols you’ll encounter:

  • Numbers: These represent the frets on the guitar. For example, “3” means to play the note on the third fret of the indicated string.
  • Lines: These represent the strings on the guitar. The top line represents the thinnest string (high E), while the bottom line represents the thickest string (low E).
  • X: This means to mute the string by not playing it.
  • O: This means to play the open string.
  • /: This means to slide up to the indicated fret.
  • : This means to slide down to the indicated fret.
  • h: This means to hammer-on to the indicated fret.
  • p: This means to pull-off to the indicated fret.
  • ~: This means to vibrato (wiggle) the string while holding the indicated fret.

Reading Tablature

To read tablature, simply look at the numbers and symbols on the lines and play the corresponding notes on your guitar. Here’s an example:

e|---------------------------0-3-5-----------------------------------------|
B|----------------------3-5-------------------------------------------------|
G|-----------------2-4-------------------------------------------------------|
D|------------0-2-3----------------------------------------------------------|
A|-------0-2-----------------------------------------------------------------|
E|--0-3-----------------------------------------------------------------------|

This tab represents the opening riff of “Smoke on the Water” by Deep Purple. The top line represents the high E string, while the bottom line represents the low E string. The numbers on each line indicate which fret to play, while the dashes represent a rest or pause.

So, to play the riff, you would play the open low E string, then play the third fret on the low E string, then the fifth fret on the low E string, and so on. You would continue to play the notes in the order indicated until the end of the tab.

Tips for Reading Tablature

  • Take it slow: Start with simple tabs and work your way up to more complex pieces. Reading tablature is a skill that takes time to develop, so be patient with yourself.
  • Listen to the song: Tablature can be helpful, but it’s not a substitute for actually hearing the music. Listen to the song you’re learning and try to play along.
  • Pay attention to rhythm: While tablature doesn’t show the exact rhythm of the music, it does give you a general idea of when to play each note. Make sure to count the beats and rests in the music and play accordingly.
  • Use a metronome: A metronome is a device that produces a steady beat, which can help you stay on track with the rhythm of the music.
  • Practice regularly: The more you practice reading tablature, the easier it will become. Try to set aside time each day to work on your skills.

Once you have become familiar with the basic elements of guitar tablature, the next step is to learn how to read more complex tablature. This may include bends, slides, hammer-ons, pull-offs, vibrato, and more.

source: youtube.com/@tacguitar

Bends are indicated in tablature by a curved arrow pointing upwards. This symbol represents the action of bending the string upwards, which raises the pitch of the note. The number next to the arrow indicates the degree to which the string should be bent. For example, a “2” above the arrow indicates a whole step bend, while a “1/2” indicates a half step bend.

Slides are indicated by a line connecting two notes. This symbol represents sliding the finger up or down the string to reach the next note. A slide up is represented by a line going upwards, while a slide down is represented by a line going downwards.

Hammer-ons and pull-offs are techniques used to play legato, or smooth, connected notes without plucking the string again. A hammer-on is indicated by a “h” between two notes. This symbol represents hammering the finger down on the string to produce the next note. A pull-off is indicated by a “p” between two notes. This symbol represents pulling the finger off the string to produce the next note.

Vibrato is a technique used to create a slight variation in pitch to add expression to a note. In tablature, vibrato is indicated by a squiggly line above the note. This symbol represents shaking the finger back and forth on the fret to create the vibrato effect.

As you continue to practice reading guitar tablature, it’s important to keep in mind that it is just one tool in your musical toolkit. While it can be a helpful way to learn new songs and practice playing, it should not be the only way you learn to play guitar. It’s important to also learn music theory, proper technique, and to practice playing by ear.

In addition to practicing your guitar skills, it’s also important to take care of your instrument. This includes regularly changing your strings, keeping your guitar clean and properly stored, and taking it to a professional for any necessary repairs or adjustments.

Overall, reading guitar tablature is an essential skill for any beginner guitarist. With practice and patience, you can quickly become proficient in reading and playing guitar tablature, allowing you to learn new songs and improve your playing skills. Remember to also focus on proper technique, music theory, and taking care of your instrument to ensure a lifetime of enjoyable guitar playing.