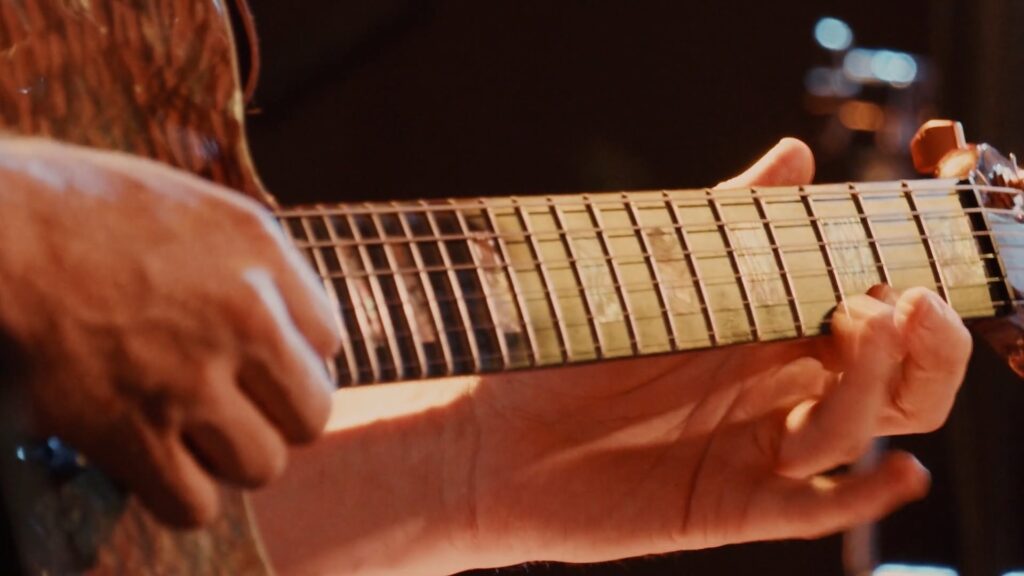
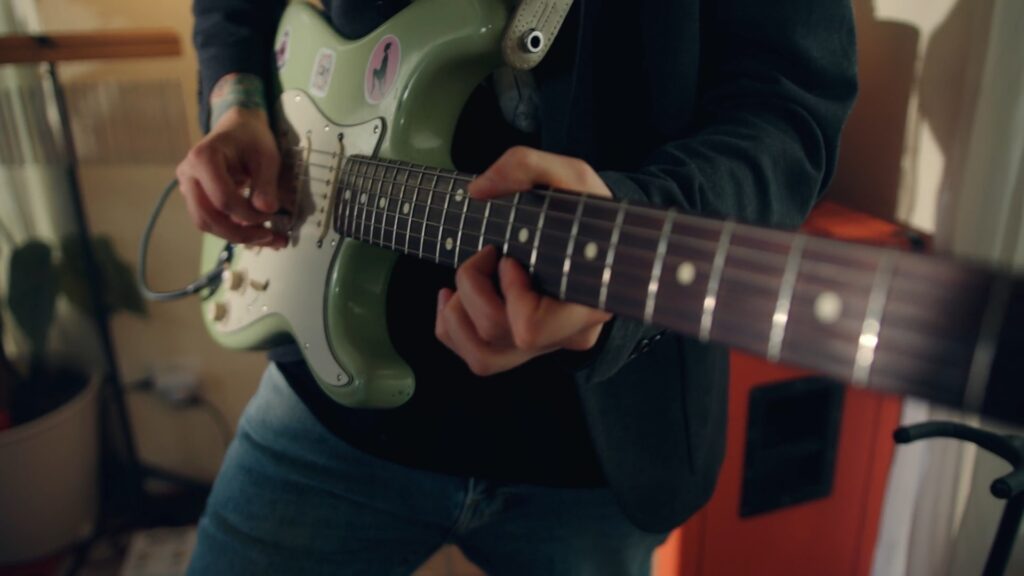
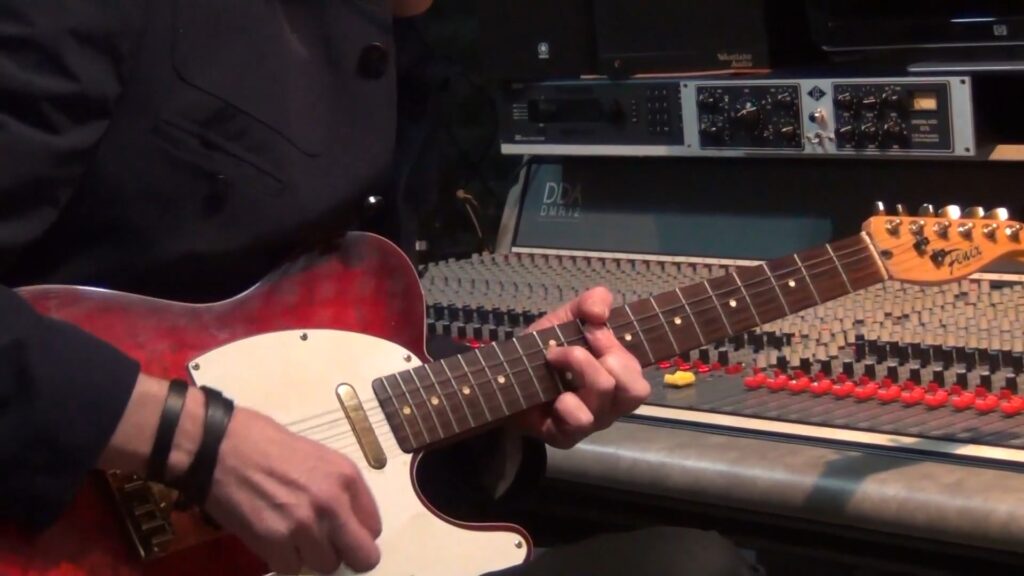
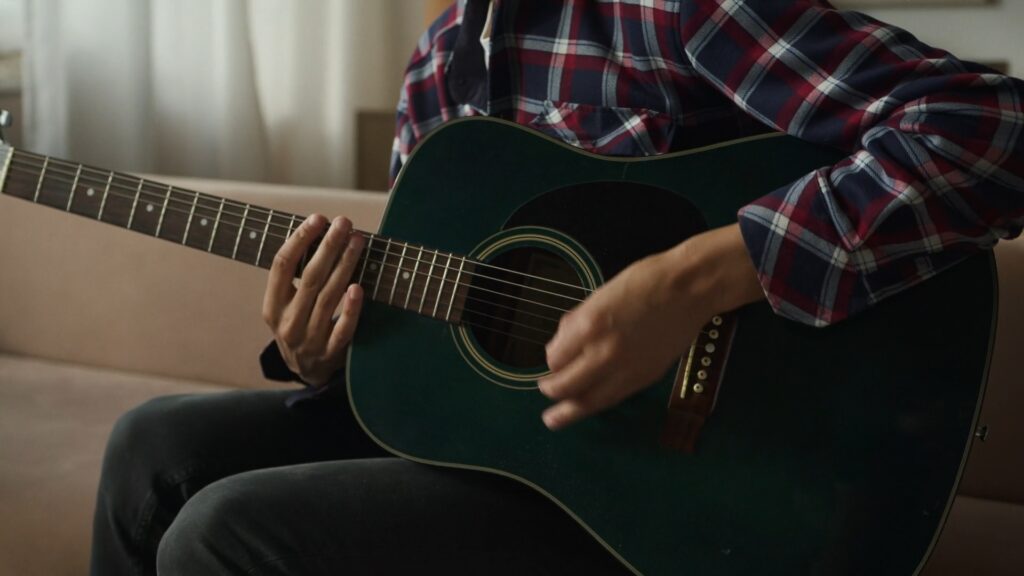
Unleashing Your Tapping Potential: Guitar Solo Song Recommendations

Tapping is a technique that has revolutionized the way guitarists approach their instrument. It allows for lightning-fast runs, intricate melodies, and a unique sound that can captivate audiences. If you’re looking to unleash your tapping potential and explore the full range of this technique, incorporating it into your repertoire through songs is a great way to do so. In this article, we’ll delve into a selection of guitar songs that not only showcase the power of tapping but also help you develop and refine your skills.

“Eruption” by Van Halen

No list of tapping songs would be complete without mentioning “Eruption” by Eddie Van Halen. This iconic instrumental track features a mind-blowing tapping section that has become one of the most recognized guitar solos in rock history. Tackling “Eruption” will challenge your speed, precision, and control over tapping techniques.

“For the Love of God” by Steve Vai

Steve Vai is renowned for his mastery of the guitar, and “For the Love of God” is a prime example of his extraordinary tapping skills. This epic song combines emotional melodies with virtuosic tapping sections, showcasing the full range of possibilities with the technique. Practicing this song will help you develop your musicality, finger coordination, and dynamics in tapping solos.

“Midnight” by Joe Satriani

“Midnight” is a mesmerizing instrumental piece by Joe Satriani that incorporates tapping in a melodic and expressive way. The song features cascading tapped arpeggios, creating a hypnotic and ethereal atmosphere. Working on “Midnight” will improve your tapping accuracy, timing, and control over complex arpeggio patterns.

“The Animal” by Guthrie Govan

Guthrie Govan is known for his versatility and technical prowess on the guitar, and “The Animal” is a prime example of his genius. This instrumental track showcases his unique approach to tapping, combining intricate tapped passages with melodic phrasing and expressive bends. Practicing “The Animal” will push your tapping technique to new heights and expand your musical vocabulary.

“Cliffs of Dover” by Eric Johnson

“Cliffs of Dover” is a masterpiece by Eric Johnson, featuring a memorable tapping section that stands out in the song’s intricate arrangement. The tapping passages in this song require precision, speed, and a keen sense of rhythm. By mastering “Cliffs of Dover,” you’ll refine your tapping technique and develop a greater sense of musicality in your playing.

“Technical Difficulties” by Racer X

“Technical Difficulties” by Racer X is a high-energy instrumental track that showcases the tapping prowess of guitarist Paul Gilbert. The song features lightning-fast tapped arpeggios and complex sequences that will challenge even the most experienced guitarists. Practicing “Technical Difficulties” will enhance your speed, accuracy, and overall control in tapping solos.

“TTNG” by Animals as Leaders

Animals as Leaders, led by guitarist Tosin Abasi, pushes the boundaries of progressive metal and incorporates tapping in innovative ways. Songs like “TTNG” showcase intricate tapping passages with complex rhythms and unique fingerings. Exploring the music of Animals as Leaders will expose you to fresh ideas and inspire you to push your tapping technique to new frontiers.

“The Glass Prison” by Dream Theater

Dream Theater’s “The Glass Prison” is a progressive metal epic that features a blend of tapping techniques throughout its duration. From fast-paced tapped runs to melodic tapping solos, this song provides ample opportunities to practice and refine your tapping skills. The complex time signatures and challenging passages will test your abilities and expand your musical horizons.

“Scarified” by Racer X

“Scarified” is another iconic track by Racer X that exemplifies the technical prowess of Paul Gilbert. This song showcases blazing-fast tapped passages, incorporating arpeggios, scales, and lightning-speed licks. Working on “Scarified” will improve your finger dexterity, speed, and accuracy in tapping solos.

“Tender Surrender” by Steve Vai

“Tender Surrender” is a beautiful composition by Steve Vai that blends melodic sensibility with intricate tapping passages. The song features soulful melodies and captivating tapping sections that allow for expressive and emotional playing. Practicing “Tender Surrender” will refine your phrasing, dynamics, and control over tapping techniques.

source: youtube.com/@DaniloVicari

As you explore these songs, remember to start at a comfortable pace and gradually increase the tempo as you gain proficiency. Break down challenging sections into smaller parts and practice them diligently. Record yourself playing to monitor your progress and identify areas that need improvement. Don’t be discouraged by the difficulty level; rather, see it as an opportunity to grow as a guitarist.

Incorporating these songs into your practice routine will not only unleash your tapping potential but also deepen your understanding of the technique. Each song offers unique challenges and opportunities for growth, helping you refine your technique, expand your musicality, and develop your own voice as a guitarist. Embrace the journey, enjoy the process, and let your tapping potential soar.
Exploring the World of Tapping: From Basics to Advanced Techniques

Tapping is a guitar technique that has gained popularity for its ability to create fast and intricate passages, allowing guitarists to achieve a unique and impressive sound. Originating in the late 1960s and popularized by guitar virtuosos like Eddie Van Halen and Steve Vai, tapping has become an essential skill for guitar players in various genres, including rock, metal, and fusion. In this comprehensive guide, we will explore the world of tapping, starting from the basics and gradually progressing to advanced techniques.

Understanding the Basics of Tapping

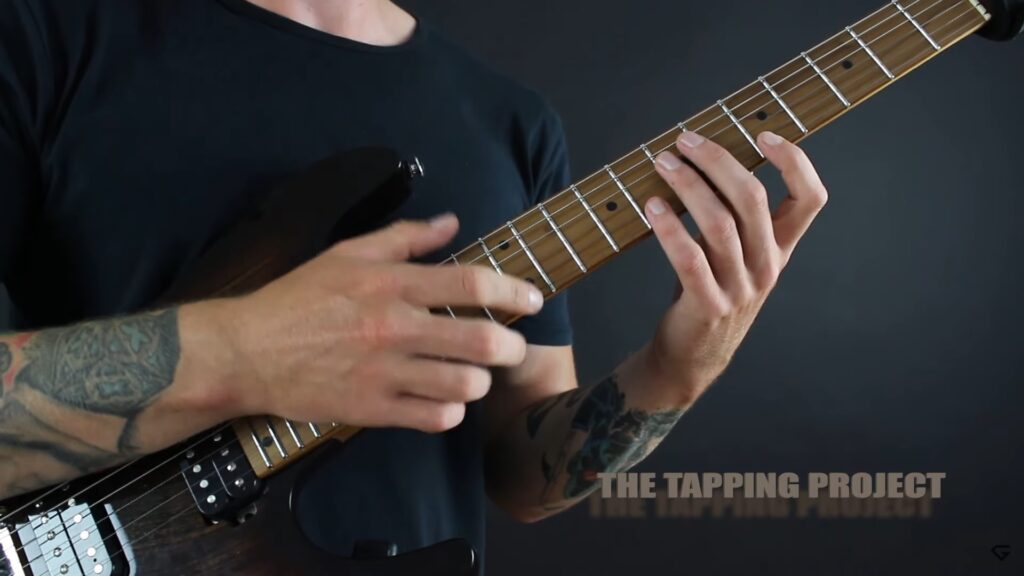
Tapping involves using both hands on the guitar neck to produce notes. The technique primarily relies on the fretting hand to tap notes on the fretboard while the picking hand supports and adds articulation. Start by familiarizing yourself with the basic mechanics of tapping, including hand positioning, thumb placement, and muting techniques. Practice tapping single notes on different strings to develop accuracy and control.

Two-Hand Tapping

Two-hand tapping takes tapping to the next level by incorporating tapping with both the fretting and picking hands simultaneously. This technique allows for greater speed and complexity in your playing. Begin with simple patterns such as tapping a note on the fretboard with your fretting hand while simultaneously plucking a string with your picking hand. Gradually progress to more intricate combinations of notes and string skipping.

Tapping Arpeggios

Arpeggios are an essential aspect of guitar playing, and tapping can add a unique flavor to these melodic sequences. Practice tapping arpeggios across different chord shapes and progressions. Start with basic triads and then explore more complex arpeggio patterns such as seventh chords and extended chords. Focus on maintaining clarity and precision in your tapping technique as you navigate through the arpeggios.

Tapping Scales and Modes

Expand your tapping vocabulary by incorporating scales and modes into your playing. Practice tapping scales such as the pentatonic scale, major scale, and minor scale. Explore various modes like the Dorian, Mixolydian, and Phrygian modes to create different tonalities and moods. Incorporate techniques like slides, hammer-ons, and pull-offs to add expressiveness and fluidity to your tapping lines.

Advanced Tapping Techniques

Once you have a solid foundation in the basics of tapping, it’s time to explore advanced techniques. These techniques include incorporating tapping with other techniques like string bending, vibrato, and harmonics. Experiment with tapping across multiple octaves, creating rapid-fire sequences, and exploring polyrhythmic patterns. Push the boundaries of your creativity and find your unique voice within the realm of tapping.

Tapping Etudes and Licks

To further develop your tapping skills, study and practice tapping etudes and licks. These musical exercises specifically designed for tapping will help you improve your finger coordination, timing, and overall technique. Look for resources online or create your own etudes and licks by transcribing and analyzing tapping passages from guitarists you admire.

Incorporating Tapping in Songwriting

Once you have honed your tapping skills, start incorporating this technique into your songwriting and improvisation. Experiment with adding tapping passages to your compositions, whether it’s in a melodic context or as a dynamic solo section. Use tapping as a tool to express your musical ideas and create captivating guitar parts.

Tapping with Effects

Tapping can be further enhanced by using effects pedals and processors. Experiment with adding delay, reverb, and distortion to your tapping passages to create atmospheric textures or blistering solos. Explore different effects and find the ones that complement your tapping style and add depth to your sound.

Analyzing Tapping Masters

Study the techniques and styles of renowned tapping guitarists to gain inspiration and insights. Analyze the works of guitarists like Eddie Van Halen, Steve Vai, Joe Satriani, and Guthrie Govan. Pay attention to their tapping phrasing, note choices, and overall approach to the technique. Incorporate elements that resonate with your musical vision into your own playing.

Practicing with Backing Tracks

To solidify your tapping skills and develop your improvisation abilities, practice with backing tracks. Use backing tracks in various styles and tempos to simulate real musical situations. Experiment with different scales, modes, and techniques while integrating tapping into your improvisations. This will help you develop the confidence and musicality necessary to incorporate tapping effectively in a band or live performance setting.

source: youtube.com/@guitarmastery

Tapping is a versatile and exciting technique that can elevate your guitar playing to new heights. By starting with the basics and gradually exploring advanced techniques, you will gain the skills and knowledge necessary to incorporate tapping into your playing style. Remember to practice regularly, be patient with yourself, and enjoy the process of exploring the vast world of tapping. With dedication and perseverance, you will unlock new possibilities and expressiveness in your guitar playing.

Mastering the Art of Fingerstyle Technique: Songs to Explore

Mastering the art of fingerstyle technique is a journey that opens up a world of musical possibilities on the guitar. It allows you to create rich, expressive, and intricate arrangements by combining melody, basslines, and chords all within the context of a single instrument. As you progress in your fingerstyle journey, it’s essential to explore a variety of songs that showcase the versatility and beauty of this technique. In this article, we will delve into a selection of songs that will help you develop and master your fingerstyle technique.

“Blackbird” by The Beatles

“Blackbird” is a timeless classic that highlights the delicate fingerpicking style of Paul McCartney. The song features a beautiful melody played on the higher strings while incorporating bass notes and chords. Practicing “Blackbird” will improve your finger independence, precision, and control. Focus on maintaining a steady rhythm and capturing the song’s nuances.

“Dust in the Wind” by Kansas

“Dust in the Wind” is a renowned fingerstyle song that incorporates arpeggios, chord progressions, and melodic lines. This song is an excellent exercise in finger coordination and fretting hand accuracy. Pay attention to the dynamics and transitions between sections, as they play a significant role in capturing the song’s emotive quality.

“Tears in Heaven” by Eric Clapton

Eric Clapton’s “Tears in Heaven” showcases the power of fingerstyle technique in conveying deep emotions. The song combines fingerpicked arpeggios, melodic lines, and chordal accompaniment. Practice this song to refine your fingerstyle dynamics, expression, and control. Focus on capturing the song’s introspective and melancholic atmosphere.

“Classical Gas” by Mason Williams

“Classical Gas” is a technically challenging fingerstyle instrumental that blends classical and contemporary elements. The song demands precision, speed, and intricate fingerpicking patterns. By tackling this song, you’ll enhance your finger dexterity, timing, and ability to execute complex arrangements.

“Little Martha” by The Allman Brothers Band

“Little Martha” is a beautiful acoustic instrumental piece by The Allman Brothers Band. The song features intricate fingerpicking patterns with a country and blues flavor. Practicing “Little Martha” will improve your fingerstyle agility, accuracy, and control over alternating basslines and melodies.

“Dust My Broom” by Robert Johnson

“Dust My Broom” is a classic blues song that translates well into a fingerstyle arrangement. It involves a combination of basslines, chords, and single-note riffs. Working on this song will enhance your ability to maintain a steady groove while incorporating blues techniques such as slides, bends, and hammer-ons.

“Embryonic Journey” by Jefferson Airplane

“Embryonic Journey” is an instrumental piece by Jefferson Airplane’s guitarist, Jorma Kaukonen. The song features intricate fingerpicking patterns with a folk-inspired melody. Practicing “Embryonic Journey” will develop your fingerstyle accuracy, timing, and the ability to weave melody and accompaniment seamlessly.

“Don’t Think Twice, It’s All Right” by Bob Dylan

Bob Dylan’s “Don’t Think Twice, It’s All Right” is a folk classic that lends itself well to fingerstyle interpretation. The song incorporates alternating basslines, strumming patterns, and melodic lines. Working on this song will improve your fingerstyle versatility, rhythm, and chordal playing.

“Landslide” by Fleetwood Mac

“Landslide” is a soulful and introspective song by Fleetwood Mac. The fingerstyle arrangement combines arpeggios, chordal accompaniment, and melodic lines. Practicing “Landslide” will enhance your fingerstyle expressiveness, dynamics, and phrasing.

“Ebon Coast” by Andy McKee

“Ebon Coast” is an instrumental masterpiece by fingerstyle virtuoso Andy McKee. The song showcases advanced fingerstyle techniques such as tapping, harmonics, and percussive elements. Although challenging, practicing “Ebon Coast” will push your fingerstyle boundaries and elevate your technical prowess.

source: youtube.com/@MarcoCirillo

As you explore these songs, remember to start at a comfortable pace and gradually increase the tempo as you gain confidence. Break down challenging passages into smaller sections and practice them slowly before integrating them into the entire song. Record yourself playing to track your progress and listen for areas that need improvement.

In addition to the songs mentioned above, continue exploring different genres and styles to expand your fingerstyle repertoire. Experiment with acoustic arrangements of pop songs, classical compositions, jazz standards, or even create your own fingerstyle interpretations of favorite tunes.

Mastering fingerstyle technique requires dedication, practice, and a passion for musical expression. As you work through these songs, focus not only on technical proficiency but also on conveying emotion and musicality through your playing. Embrace the journey, enjoy the process, and let your fingerstyle technique flourish.

Fingerstyle Guitar Patterns and Exercises: Building Your Repertoire

Fingerstyle guitar playing is a captivating technique that allows guitarists to create beautiful melodies, harmonies, and rhythms all on a single instrument. It involves plucking the strings with the fingers instead of using a pick, giving the player greater control over dynamics and expression. One of the keys to mastering fingerstyle guitar is building a solid repertoire of patterns and exercises that enhance your fingerpicking skills and musicality. In this article, we will explore various fingerstyle guitar patterns and exercises that will help you develop your technique and build a strong repertoire.

Basic Fingerstyle Patterns

Start by practicing basic fingerstyle patterns that involve plucking the strings with your thumb (T), index finger (I), middle finger (M), and ring finger (A). A popular pattern to begin with is the Travis picking pattern, where you alternate between thumb and fingers, playing a bass note with the thumb and plucking the higher strings with the fingers. Practice this pattern slowly and gradually increase your speed and accuracy.

Arpeggios

Arpeggios are sequences of notes played one at a time, often used in fingerstyle guitar to outline chords. Practice arpeggio patterns across different chord shapes and progressions. Start with simple major and minor arpeggios, and then progress to more complex patterns such as seventh chords and extended chords. Focus on precision, clarity, and evenness in your fingerpicking.

Fingerstyle Exercises

Dedicate time to fingerstyle exercises that target specific techniques and challenges. These exercises can include patterns that focus on finger independence, coordination, and speed. For example, practice exercises that involve playing scales, intervals, and chromatic runs using fingerstyle technique. This will help strengthen your fingers and develop dexterity.

Chord Melodies

Chord melodies combine chords and melodies, allowing you to play both at the same time. Start by selecting a simple melody and harmonizing it with appropriate chords. Practice playing the melody notes on the higher strings while simultaneously strumming or plucking the chords. This technique requires careful coordination between your fretting hand and picking hand.

Thumb Independence Exercises

Developing thumb independence is crucial for fingerstyle guitar playing. Practice exercises that involve playing bass notes with your thumb while simultaneously playing melodies or chords with your fingers. Start with simple patterns and gradually increase the complexity. This will enhance your ability to maintain a steady bass line while executing other fingerstyle techniques.

Percussive Techniques

Explore percussive techniques such as slaps, taps, and muted notes to add rhythmic and percussive elements to your fingerstyle playing. Practice incorporating these techniques into your patterns and exercises to enhance your rhythmic and dynamic range. Experiment with different areas of the guitar body to achieve different sounds and tones.

Fingerstyle Etudes

Etudes are musical compositions specifically designed to target technical challenges and musical concepts. Search for fingerstyle etudes or create your own using various techniques and patterns you’ve learned. Etudes help you apply fingerstyle techniques in a musical context and develop your own unique style.

Learning Fingerstyle Songs

Building your repertoire is not only about exercises but also about learning and playing fingerstyle songs. Choose songs that align with your skill level and gradually tackle more complex arrangements. Analyze the fingerstyle patterns used in these songs and practice them in isolation before integrating them into the complete song.

Transcribing Fingerstyle Guitar Solos

Transcribing fingerstyle guitar solos is an excellent way to study and incorporate advanced fingerstyle patterns and techniques into your playing. Select solos from renowned fingerstyle guitarists and carefully analyze the patterns and techniques they use. Transcribe and practice these solos to improve your overall fingerstyle proficiency.

Recording and Analyzing Your Progress

Record yourself playing fingerstyle patterns and exercises to assess your progress over time. Listen back to identify areas for improvement, such as timing, clarity, or dynamics. Use this feedback to refine your technique and set goals for further development.

source: youtube.com/@MusoraOfficial

Remember, consistent practice is key to mastering fingerstyle guitar patterns and exercises. Dedicate regular practice sessions to work on these techniques, starting with simpler patterns and gradually progressing to more complex ones. Focus on precision, clarity, and musicality in your playing. With time and perseverance, you will build a strong fingerstyle repertoire and develop a unique style that showcases your musical expression and creativity.

Sliding Into Success: Tips and Tricks for Perfecting Guitar Slide Technique

source: pexels.com/@mati/

As a guitarist, you are always looking for ways to improve your skills and expand your repertoire. One technique that can add depth and flavor to your playing is guitar sliding. The slide technique involves sliding your fingers along the guitar strings to produce a smooth, gliding sound. In this article, we will explore the basics of guitar sliding and provide you with tips and tricks for perfecting your technique.

Getting Started with Guitar Slides

Before diving into the techniques of guitar sliding, it’s important to have the right equipment. You will need a slide, which is a small tube made of metal, glass, or ceramic that fits over your finger. You can choose between different materials and sizes depending on your preferences and the sound you want to achieve.

Once you have your slide, it’s time to practice. Start by placing the slide on your finger and gently placing it over the strings. You want to make sure the slide is perpendicular to the frets and the strings are touching the slide evenly. It may take a few tries to get it right, so be patient and keep practicing.

Guitar Slide Techniques

Now that you have the basics down, it’s time to explore some guitar slide techniques. Here are some tips and tricks for perfecting your slide technique:

  1. Practice on the higher frets first. Sliding on the higher frets is easier than on the lower frets because the strings are tighter and require less pressure. Once you have mastered the higher frets, you can move on to the lower frets.
  2. Use vibrato to add depth and emotion to your playing. Vibrato involves bending the note slightly up and down while sliding, creating a vibrational effect. This technique can add a lot of depth and emotion to your playing.
  3. Experiment with different finger positions. You can use different fingers to hold the slide, depending on the sound you want to achieve. For example, using your pinky finger can produce a brighter, more cutting sound.
  4. Play with different pressure and speed. Varying the pressure and speed of your slide can produce different sounds and effects. Experiment with different combinations to find the ones that work best for you.
  5. Practice with backing tracks. Practicing with backing tracks can help you improve your timing and accuracy. You can find backing tracks online or create your own.
source: youtube.com/@sweetwater

Common Mistakes to Avoid

While guitar sliding can add a lot of depth and flavor to your playing, it’s important to avoid some common mistakes. Here are some things to watch out for:

  1. Placing the slide too close to the fret. If you place the slide too close to the fret, it can produce a buzzing sound. Make sure the slide is placed in the middle of the fret to avoid this.
  2. Pressing too hard. Pressing too hard can produce a muffled sound. Remember to keep a light touch and let the slide do the work.
  3. Sliding too fast. Sliding too fast can make the notes sound sloppy and out of control. Start slow and gradually increase your speed as you become more comfortable with the technique.
  4. Not muting the strings. When sliding, it’s important to mute the strings that you are not playing. This can be done with your picking hand or by lightly touching the strings with your fretting hand.

Guitar sliding is a technique that can add depth and flavor to your playing. By practicing the techniques outlined in this article and avoiding common mistakes, you can master the art of guitar sliding and take your playing to the next level. Remember to experiment with different techniques and have fun!

Bending Notes on Guitar: Techniques and Exercises for Improving Your Pitch Control

Bending notes is a fundamental technique that every guitarist must learn. By bending the strings, you can create expressive and emotive sounds that add depth to your playing. However, bending notes can be tricky to master, and it takes time and practice to develop the necessary control and precision.

In this article, we will explore the techniques and exercises you can use to improve your pitch control and enhance your bending skills.

guitar bending
source: pexels.com/@kelly-1179532

The Basics of Bending

Before we delve into the techniques and exercises, let’s start with the basics of bending. Bending is achieved by pushing or pulling the string across the fretboard to raise or lower the pitch of the note. Bends can be either half-step or whole-step, depending on how far you bend the string.

To execute a bend, start by fretting the note you want to bend. Then, place your other fingers behind the fretting finger to provide support. Use your fretting hand to push or pull the string towards the ceiling or the floor, depending on whether you want to raise or lower the pitch. As you bend the string, use your ear to guide you and aim for the desired pitch.

Techniques for Improving Your Bending

Now that we’ve covered the basics let’s explore some techniques for improving your bending:

  1. Practice Slowly: When starting with bends, begin by practicing slowly to build muscle memory and develop precision. Take your time to get comfortable with the motion of bending and develop the necessary finger strength.
  2. Use Your Ear: Bending requires a good sense of pitch, so use your ear to guide you. Listen closely to the note you want to bend to and aim for the desired pitch. You can also use a tuner to check if you’re hitting the right pitch.
  3. Keep Your Fingers Close to the Fretboard: To achieve clean and precise bends, keep your fingers as close to the fretboard as possible. This will help prevent unwanted noise and buzzing.
  4. Apply Pressure with Your Fingertips: When bending, apply pressure with your fingertips rather than the pads of your fingers. This will give you more control over the string and help you achieve more precise bends.
  5. Use Vibrato to Enhance Your Bends: Vibrato is a technique that involves oscillating the pitch of a note. Use vibrato after bending to enhance the expressive quality of your playing.
source: youtube.com/@justinguitar

Exercises for Improving Your Bending

Now that we’ve explored some techniques let’s move onto exercises that will help you improve your bending:

  1. Whole-Step Bends: Start by practicing whole-step bends. Play a note and bend it up a whole-step (two frets). Hold the bent note for a few seconds, then release it back to its original pitch. Repeat this exercise on different strings and frets to build muscle memory.
  2. Half-Step Bends: Once you’re comfortable with whole-step bends, move onto half-step bends (one fret). Practice bending up and down on different strings and frets, using your ear to guide you.
  3. Pre-Bends: A pre-bend involves bending a note before playing it. Start by fretting a note, bending it up a whole-step, and then picking it. This exercise will help you develop control over your bends and improve your accuracy.
  4. Bend and Release: This exercise involves bending a note up a whole-step, holding it for a few seconds, and then releasing it back to its original pitch. Repeat this exercise on different strings and frets to build finger strength and control.

Bending notes on guitar is a technique that can add emotion and dynamics to your playing. To master this technique, it is important to understand the basic mechanics of bending, warm up your fingers, practice different techniques and exercises, and pay attention to the sound of your notes. With time and practice, you can develop better pitch control and finger strength, and create a more expressive and dynamic sound on the guitar.

The Power of Vibrato: How to Add Emotion and Dynamics to Your Guitar Playing

The guitar is an incredibly expressive instrument, capable of conveying a wide range of emotions and moods. One technique that can help add depth and nuance to your playing is vibrato. In this article, we’ll explore what vibrato is, why it’s important, and how you can incorporate it into your playing.

What is Vibrato?

Vibrato is a technique used by guitarists to create a slight variation in pitch by rapidly oscillating the string back and forth. It’s often used to add a sense of emotion, warmth, and depth to notes, and can be used in a variety of genres, from blues to rock to classical.

Why is Vibrato Important?

Vibrato is an important technique for any guitarist to master because it can add a lot of nuance and expression to your playing. By adding a slight variation in pitch to your notes, you can create a sense of tension and release, which can help convey a range of emotions, from sadness to joy to anger.

In addition, vibrato can help your notes sustain longer, making them sound fuller and more powerful. This can be especially useful when playing slower, more melodic pieces, where you want to create a sense of resonance and depth.

source: youtube.com/@justinguitar

How to Incorporate Vibrato into Your Playing

There are many different ways to incorporate vibrato into your playing, depending on your playing style and genre. Here are a few tips to get you started:

  1. Start Slow: If you’re new to vibrato, start by practicing it slowly. Focus on getting a smooth and even oscillation of the string. Try to keep your hand relaxed and use a light touch to avoid bending the string too much.
  2. Use Your Wrist: When performing vibrato, use your wrist to create the oscillation. Keep your fingers loose and use a light touch to create the desired effect.
  3. Vary Your Speed: Experiment with different speeds of vibrato to see how they affect the mood and feel of your playing. A slower vibrato can create a sense of melancholy or longing, while a faster vibrato can create a sense of urgency or excitement.
  4. Experiment with Different Techniques: There are many different ways to perform vibrato, including using your fingers, using your arm, or using a tremolo bar. Experiment with different techniques to find the one that works best for you and your playing style.
  5. Listen to Other Players: One of the best ways to learn vibrato is to listen to other players who use it effectively. Listen to a range of genres and styles to see how different players incorporate vibrato into their playing.

Vibrato is a powerful technique that can help add emotion, depth, and nuance to your guitar playing. By practicing the tips outlined in this article, you can start incorporating vibrato into your playing and take your guitar skills to the next level.

Sweep Picking: A Guide to Mastering the Technique

Sweep picking is a popular guitar technique used by many famous guitarists such as Yngwie Malmsteen, Eddie Van Halen, and Steve Vai. It involves using the pick to sweep across the strings in a fluid motion, playing multiple notes with one stroke of the pick. While it may look intimidating, sweep picking is actually a relatively simple technique to learn with enough practice and dedication. In this comprehensive guide, we will break down the basics of sweep picking and provide tips and exercises to help you master this technique.

Sweep Picking guitar
source: pexels.com/@cottonbro

The Basics of Sweep Picking

Before diving into the technique itself, it is important to understand the basics of sweep picking. Sweep picking involves playing arpeggios, or broken chords, in a sweeping motion across the strings. Instead of playing each note individually, as with alternate picking, sweep picking allows you to play multiple notes at once, creating a fluid, sweeping sound.

To start, choose a basic arpeggio, such as a major or minor triad, and practice playing it with a simple downstroke sweep. Start by placing your fretting hand on the appropriate chord shape, and position your picking hand above the strings, angling the pick slightly downward toward the floor. Then, using a smooth, sweeping motion, drag the pick across the strings in a downward motion, playing each note of the arpeggio in a fluid motion.

Common Sweep Picking Techniques

While the basic technique of sweep picking involves playing arpeggios with a sweeping motion, there are several different techniques and variations that can be used to add variety and complexity to your playing.

One common technique is to incorporate hammer-ons and pull-offs into your sweep picking. This involves using your fretting hand to add extra notes to the arpeggio by quickly hammering on or pulling off to a higher or lower fret. This technique allows you to add more notes and create a more intricate sound.

Another technique is to incorporate tapping into your sweep picking. This involves using your picking hand to tap on the fretboard, playing additional notes and creating a faster, more complex sound.

source: youtube.com/@RobertBakerGuitar

Tips for Mastering Sweep Picking

As with any guitar technique, mastering sweep picking takes time and practice. Here are some tips to help you improve your sweep picking skills:

  1. Start Slow: Sweep picking requires a lot of precision and accuracy, so it is important to start slow and gradually build up speed. Start by practicing the technique at a slow tempo, focusing on accuracy and fluidity.
  2. Use a Metronome: A metronome can be a helpful tool when practicing sweep picking. Start at a slow tempo and gradually increase the speed as you become more comfortable with the technique.
  3. Practice Different Arpeggios: To master sweep picking, it is important to practice different arpeggios in various positions on the fretboard. This will help you to develop a better understanding of the technique and how it can be applied to different chord shapes and musical contexts.
  4. Focus on Cleanliness: Sweep picking requires precise and accurate picking, so it is important to focus on cleanliness and eliminate any unwanted string noise. Practice muting strings with your fretting hand and using the appropriate picking technique to avoid unwanted noise.
  5. Experiment with Different Techniques: Sweep picking can be combined with other techniques such as tapping and legato playing to create a more intricate sound. Experiment with different techniques and find what works best for your playing style.

Sweep picking is a popular and versatile guitar technique that can add flavor and complexity to your playing. While it may seem daunting at first, with enough practice and dedication, anyone can master this technique. By starting slow, focusing on accuracy and cleanliness, and experimenting with different techniques, you can develop your own unique style of sweep picking and take your playing to the next

How to Use Hammer-Ons and Pull-Offs to Add Flavor to Your Guitar Playing

Hammer-ons and pull-offs are guitar techniques that allow you to add flavor and style to your playing. These techniques can be used to create smoother, more fluid transitions between notes, and can add a lot of depth and interest to your playing. In this article, we’ll explore how to use hammer-ons and pull-offs to enhance your guitar playing.

What Are Hammer-Ons and Pull-Offs?

Hammer-ons and pull-offs are both techniques that involve playing notes without picking the strings. A hammer-on is when you use your fretting hand to play a note by “hammering” your finger down on the string, creating a new note without picking the string again. A pull-off is the opposite – it’s when you use your fretting hand to “pull off” the string and create a new note without picking the string again.

Why Are Hammer-Ons and Pull-Offs Useful?

Hammer-ons and pull-offs can be used to create smoother transitions between notes. For example, if you’re playing a scale and you want to create a legato effect, you can use hammer-ons and pull-offs to create a seamless transition between each note. Additionally, these techniques can add a lot of flavor and interest to your playing, allowing you to create a more dynamic and interesting sound.

How to Play Hammer-Ons

To play a hammer-on, start by fretting a note with your left hand. Then, without picking the string again, use your left hand to “hammer” down on the string at a higher fret. This will create a new note without the need to pick the string again. You can also play multiple hammer-ons in a row by fretting one note, hammering on to a higher fret, and then hammering on to an even higher fret.

How to Play Pull-Offs

To play a pull-off, start by fretting a note with your left hand. Then, without picking the string again, use your left hand to “pull off” the string to a lower fret. This will create a new note without the need to pick the string again. You can also play multiple pull-offs in a row by fretting one note, pulling off to a lower fret, and then pulling off to an even lower fret.

source: youtube.com/@GuitarCompass

Combining Hammer-Ons and Pull-Offs

Once you’ve mastered the basics of hammer-ons and pull-offs, you can start to combine them to create more complex and interesting patterns. For example, you can start by playing a note, then hammering on to a higher note, pulling off to a lower note, and then hammering on to another higher note. This will create a sequence of notes that is both fluid and interesting.

Tips for Using Hammer-Ons and Pull-Offs Effectively

To use hammer-ons and pull-offs effectively, it’s important to pay attention to your timing and technique. Here are a few tips to help you get started:

  1. Start slow. When you’re first learning these techniques, it’s important to start slow and focus on accuracy and control.
  2. Practice with a metronome. Using a metronome can help you stay in time and develop a sense of rhythm and timing.
  3. Focus on your finger strength. Hammer-ons and pull-offs require a lot of finger strength, so make sure to practice exercises that help build up your finger strength.
  4. Experiment with different patterns. Don’t be afraid to experiment with different hammer-on and pull-off patterns to find what works best for you.
  5. Pay attention to your tone. The way you play hammer-ons and pull-offs can have a big impact on your tone, so make sure to pay attention to your technique and how it’s affecting your sound.

Hammer-ons and pull-offs are versatile techniques that can add a lot of flavor and complexity to your guitar playing. By practicing these techniques and experimenting with different fingerings and levels of pressure, you can create your own unique sound and style on the guitar.

Muting vs. Palm-Muting: What’s the Difference and When to Use Each Technique?

As a guitarist, it’s important to have a variety of techniques at your disposal to create dynamic and interesting sounds. Two techniques that are often used to control the sound of a guitar are muting and palm-muting. Although similar, these techniques have distinct differences and are used in different situations. In this article, we’ll explore the difference between muting and palm-muting and provide tips on when to use each technique.

Muting is a technique where you stop the strings from vibrating using your picking hand or other parts of your body such as your fretting hand. There are several ways to mute a guitar string, including using your palm, fingers, or even your elbow. Muting is used to create a staccato sound or to stop unwanted string noise. It’s an essential technique to master for any style of playing, from jazz to metal.

Palm-muting is a specific type of muting technique where you use the palm of your picking hand to mute the strings. Palm-muting creates a percussive sound that is perfect for playing heavy and rhythmic parts. To palm-mute a string, rest the side of your palm on the bridge of your guitar and apply enough pressure to stop the string from vibrating. The amount of pressure you apply will determine the amount of sustain and volume of the muted note.

source: youtube.com/@seandaniel23

The main difference between muting and palm-muting is the way the strings are muted. With muting, you can use various parts of your body to stop the strings from vibrating, whereas palm-muting is specifically done with the palm of your picking hand. Additionally, palm-muting creates a more percussive and muted sound than regular muting, which can create a more staccato sound.

So when should you use each technique? Muting is useful in situations where you want to create a short, staccato sound. For example, in funk or jazz playing, you may want to use muting to create a tight and rhythmic sound. Muting is also essential when playing with distortion or high gain because it helps to stop unwanted string noise.

Palm-muting, on the other hand, is useful in situations where you want to create a percussive and muted sound. Palm-muting is commonly used in rock and metal music to create heavy and rhythmic parts. You can also use palm-muting to create a muted bassline, where you play muted notes on the lower strings of the guitar.

One important thing to keep in mind when using either technique is the placement of your hands. When muting, make sure your fingers are resting lightly on the strings, so they are ready to stop any unwanted string noise. When palm-muting, make sure your palm is resting on the bridge of the guitar and not on the strings themselves. This will ensure you get the right amount of pressure and create the desired sound.

Muting and palm-muting are both essential techniques for guitarists to master. Although similar, they have distinct differences and are used in different situations. Muting is used to create a short, staccato sound or to stop unwanted string noise, while palm-muting is used to create a percussive and muted sound that is perfect for heavy and rhythmic parts. By mastering these techniques, you’ll be able to create a variety of dynamic and interesting sounds on your guitar.