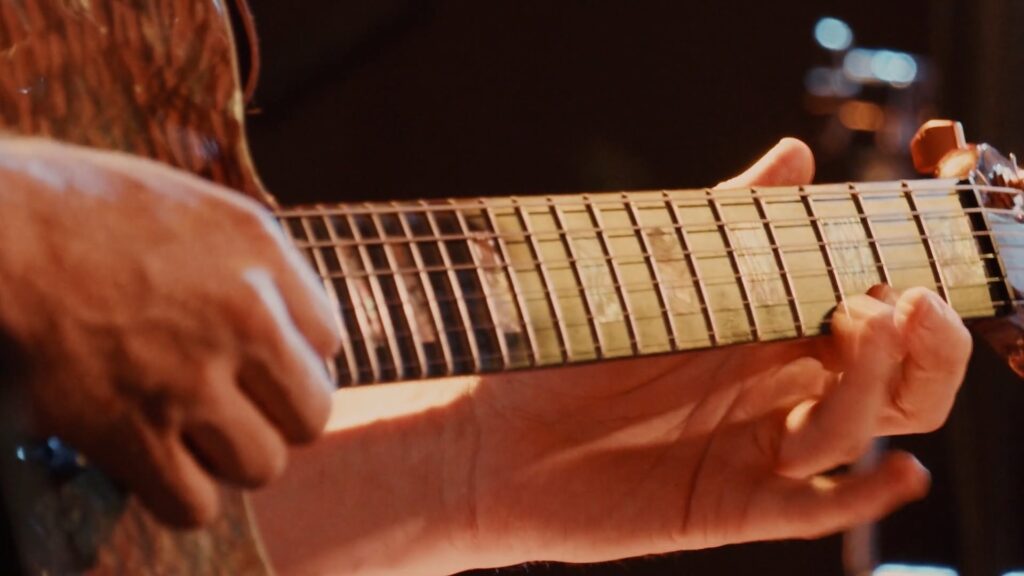
Guitar Tablature: The Ultimate Guide for Novice Musicians

Playing the guitar is an enjoyable experience, but it can be challenging for beginners who are not familiar with the various elements of music. Guitar tablature (often shortened to “guitar tabs”) is one such element that can make learning the guitar easier. In this ultimate guide, we will discuss everything you need to know about guitar tablature, including its basics, how to read it, and its advantages.

What is Guitar Tablature?

Guitar tablature is a system of notation that is commonly used by guitarists to read and play music. It is a form of shorthand that is easier to understand than traditional sheet music notation. The tablature consists of six horizontal lines, each representing a string of the guitar. The numbers written on each line indicate which fret to play on that particular string.

How to Read Guitar Tablature

Reading guitar tablature may seem intimidating at first, but it is easy to learn. Let’s take a closer look at the basic elements of guitar tablature:

  1. Strings: The six horizontal lines represent the strings of the guitar. The top line represents the thinnest string, while the bottom line represents the thickest string.
  2. Frets: The numbers written on each string indicate which fret to play. For example, if the number 3 is written on the second line, it means that you should press down on the second fret of the second string.
  3. Chords: Chords are indicated by multiple numbers written vertically on the tablature. For example, if you see the numbers 3, 5, and 5 written vertically on the third string, it means that you should play the third fret on the third string, and the fifth fret on both the fourth and fifth strings simultaneously.
  4. Techniques: Guitar tablature can also indicate specific techniques, such as slides, bends, hammer-ons, and pull-offs. These techniques are typically indicated by symbols placed above or below the tablature.

Advantages of Guitar Tablature

Guitar tablature is a useful tool for novice musicians who want to learn how to play the guitar quickly. Here are some advantages of using guitar tablature:

  1. Easy to read: Compared to traditional sheet music, guitar tablature is easier to read, and beginners can quickly learn how to play their favorite songs.
  2. Visual aid: Guitar tablature provides a visual representation of the guitar neck and the notes to be played, making it easier to understand.
  3. Variety: Guitar tablature can be used to play various styles of music, including rock, blues, and country.
  4. No musical training required: Unlike traditional sheet music notation, guitar tablature does not require any prior musical training. Anyone can learn to read and play guitar tablature with a little practice.
source: youtube.com/@pikuattri5

Guitar tablature is an essential tool for novice musicians who want to learn how to play the guitar quickly. It is easy to read, provides a visual representation of the guitar neck and the notes to be played, and does not require any prior musical training. By following the basics of guitar tablature, you can learn how to play your favorite songs on the guitar and improve your playing skills.

Reading Guitar Tabs: Common Mistakes to Avoid and Improve Your Playing

Guitar tabs are a popular method of notating music for guitarists of all skill levels. They are an easy-to-understand way to communicate how to play a song, but they do require some basic knowledge of how to read them. In this article, we will explore some of the common mistakes that guitarists make when reading tabs and how to avoid them to improve your playing.

Mistake #1: Misreading the Numbers

The most common mistake that guitarists make when reading tabs is misreading the numbers. Tabs use numbers to indicate which fret to play on which string. For example, a “0” means to play an open string, while a “1” means to play the first fret on that string. It’s easy to misread a “1” as a “7” or a “3” as an “8” if you’re not careful, especially when the numbers are close together.

To avoid this mistake, take your time when reading tabs and make sure you’re looking at the numbers carefully. You can also use your ear to double-check that you’re playing the right notes.

Mistake #2: Ignoring the Rhythm

Another common mistake that guitarists make when reading tabs is ignoring the rhythm. Tabs don’t have a traditional notation system for rhythm, so it’s up to the guitarist to listen to the song and figure out the timing. This can be challenging, especially if you’re not used to playing along with music.

To avoid this mistake, try playing along with the song as you read the tab. Pay attention to how the notes line up with the rhythm of the song. You can also use online resources to find the rhythm for a song if you’re struggling.

Mistake #3: Not Understanding the Symbols

Tabs use symbols to indicate various techniques, such as slides, bends, and hammer-ons. These symbols can be confusing if you’re not familiar with them, and it’s easy to overlook them altogether.

To avoid this mistake, familiarize yourself with the symbols used in tabs. You can find a comprehensive list online or in a guitar tab book. Practice these techniques slowly and gradually increase your speed as you become more comfortable with them.

Mistake #4: Playing Too Fast

When learning a new song, it’s common for guitarists to try to play too fast too soon. This can lead to mistakes and frustration, especially if you’re struggling to keep up with the tab.

To avoid this mistake, start by playing the song at a slower tempo. This will help you focus on the correct notes and rhythms. As you become more comfortable with the song, gradually increase your speed until you can play it at the correct tempo.

Mistake #5: Not Using Your Ear

Finally, one of the biggest mistakes that guitarists make when reading tabs is not using their ear. Tabs are a great tool, but they can’t replace the importance of using your ear to learn a song.

To avoid this mistake, take the time to listen to the song you’re learning. Pay attention to the nuances of the music, such as the dynamics and phrasing. This will help you develop your ear and improve your playing overall.

source: youtube.com/@brandonacker

Reading guitar tabs is a valuable skill for any guitarist to have. By avoiding these common mistakes, you can improve your ability to read tabs and play the music you love. Remember to take your time, practice slowly, and use your ear to really connect with the music you’re playing.

Tablature vs. Sheet Music: Which is the Best Way to Read Music on Guitar?

When it comes to learning how to play music on the guitar, there are two main forms of notation: tablature and sheet music. Both are used to convey the notes and rhythm of a song, but they do so in very different ways. In this article, we will explore the pros and cons of tablature and sheet music and help you decide which one is the best way to read music on guitar.

Tablature

Tablature, also known as tabs, is a form of notation that is specific to the guitar. Tabs use a combination of numbers, symbols, and letters to indicate which strings to play and where to place your fingers on the fretboard. Tabs are popular among guitar players because they are easy to read and understand, especially for beginners who may not have a background in music theory.

Pros of Tablature:

  • Tabs are easy to read and understand, even for beginners.
  • Tabs provide a visual representation of where to place your fingers on the fretboard, which is helpful for learning new songs.
  • Tabs are widely available online for free, making them easily accessible to anyone.

Cons of Tablature:

  • Tabs do not indicate rhythm, so you will need to listen to the song to learn the timing.
  • Tabs may not include all the details of the song, such as dynamics or articulations.
  • Tabs are not a universal form of notation, so they may not be suitable for communicating with other musicians who use sheet music.

Sheet Music

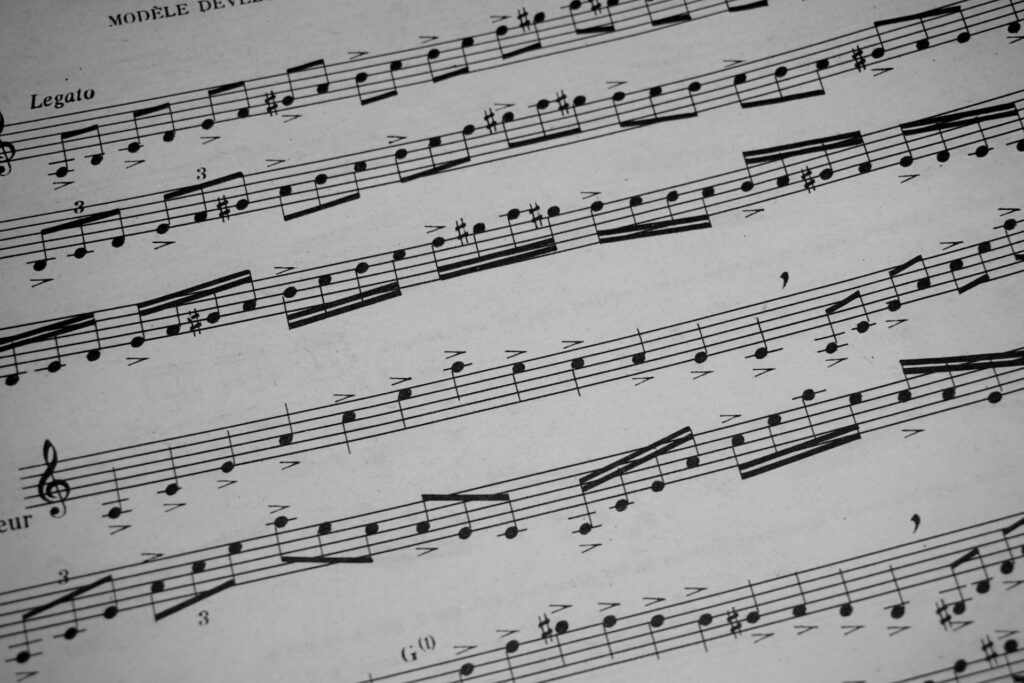
Sheet music, also known as standard notation, is a universal form of notation used by musicians of all kinds. Sheet music uses a combination of symbols, notes, and rhythmic markings to convey the melody, harmony, and rhythm of a song. Sheet music is popular among classical guitarists and musicians who play in ensembles, such as bands or orchestras.

Pros of Sheet Music:

  • Sheet music is a universal form of notation that can be used by musicians of all kinds.
  • Sheet music provides a detailed representation of the music, including rhythm, dynamics, and articulations.
  • Sheet music is suitable for communicating with other musicians who use sheet music.

Cons of Sheet Music:

  • Sheet music can be difficult to read and understand, especially for beginners.
  • Sheet music does not provide a visual representation of where to place your fingers on the fretboard.
  • Sheet music may not be as readily available as tabs, and it may need to be purchased or borrowed from a library.
source: youtube.com/@PhilGoldenberg

Which One Should You Choose?

The decision between tablature and sheet music ultimately comes down to your goals as a guitar player. If you are a beginner who wants to learn how to play your favorite songs quickly, tabs may be the best choice for you. Tabs are easy to read and understand, and they provide a visual representation of where to place your fingers on the fretboard. However, if you want to develop your skills as a musician and play in ensembles, learning sheet music may be a more beneficial choice. Sheet music provides a detailed representation of the music, including rhythm, dynamics, and articulations, which can help you become a more well-rounded musician.

Both tablature and sheet music have their pros and cons, and the decision between the two ultimately comes down to your personal goals and preferences as a guitar player. Whether you choose tabs or sheet music, the most important thing is to keep practicing and learning new songs to continue improving your skills as a musician.

The Language of Guitar Tabs: Understanding the Meaning Behind the Numbers and Symbols

If you are a guitarist, chances are you have come across guitar tabs (tablature) at some point in your musical journey. Guitar tabs are a form of notation used to represent how to play a piece of music on the guitar. They use a combination of numbers, symbols, and letters to indicate which strings to play and where to place your fingers on the fretboard.

If you are new to guitar tabs, the symbols and numbers may seem confusing at first glance. But with a bit of practice, you can quickly learn to decode the language of guitar tabs. In this article, we will guide you through the basics of understanding the meaning behind the numbers and symbols used in guitar tabs.

The Numbers

The numbers used in guitar tabs indicate which fret to press down on a particular string. For example, the number 1 indicates the first fret, while the number 2 indicates the second fret, and so on. The number 0 indicates an open string, meaning you play the string without pressing down on any fret.

When you see multiple numbers stacked vertically, it means you need to play a chord. Each number represents the fret number you need to press down on a particular string to create the chord. For example, if you see the numbers 1, 2, and 3 stacked vertically on a string, it means you need to press down on the first, second, and third frets of that string simultaneously.

The Symbols

In addition to numbers, guitar tabs also use various symbols to indicate how to play a particular note. Here are some of the most common symbols used in guitar tabs:

  • Hammer-on: A hammer-on is indicated by a curved line connecting two notes. It means you need to play the first note and then hammer your finger onto the next fret without picking the string again.
  • Pull-off: A pull-off is the opposite of a hammer-on and is indicated by a curved line connecting two notes. It means you need to play the first note and then pull your finger off the fretboard to produce the second note.
  • Slide: A slide is indicated by a line connecting two notes, and it means you need to slide your finger along the fretboard from the first note to the second note without picking the string again.
  • Bend: A bend is indicated by an upward arrow and a number indicating how far to bend the string. It means you need to press down on the string and bend it up to the indicated pitch.
  • Vibrato: Vibrato is indicated by a wavy line above the note, and it means you need to oscillate your finger back and forth on the fret to create a vibrating sound.
  • Palm mute: A palm mute is indicated by the letter “P” above the note. It means you need to place the fleshy part of your palm on the strings near the bridge to mute the sound while picking the note.

Understanding these symbols is crucial to interpreting guitar tabs accurately. By mastering the different symbols used in guitar tabs, you can add dynamics and nuances to your playing that are not easily conveyed in standard notation.

source: youtube.com/@GuitarTricks

Guitar tabs are a powerful tool for learning and playing music on the guitar. Understanding the meaning behind the numbers and symbols used in guitar tabs is essential for decoding them accurately. By mastering the language of guitar tabs, you can open up a whole new world of music and take your playing to the next level.

Guitar Tabs Explained: Understanding the Different Parts and Their Significance

Guitar tabs, also known as tablature, have become a popular and efficient way for guitarists to learn and play their favorite songs. A guitar tab is essentially a visual representation of the fretboard, where numbers and symbols indicate which strings and frets to play. To fully understand how to read guitar tabs, it’s important to be familiar with its different parts and their significance. In this article, we’ll explore the different parts of a guitar tab and how they work.

Staff

The staff is where the guitar tab is written. It’s usually composed of six horizontal lines representing the six strings of the guitar. The line at the bottom represents the low E string while the top line represents the high E string. Each line represents a specific string and the numbers written on the lines indicate the frets to be played on that particular string.

Numbers

The numbers on the staff indicate the fret number to be played on a specific string. For example, if a “2” is written on the second line from the bottom, it means that you need to fret the second fret on the E string.

Symbols

Aside from numbers, guitar tabs also use symbols to indicate specific techniques or playing styles. Some of the most common symbols include:

  • Hammer-ons: represented by a curved line connecting two numbers, it means that you should hammer-on the string from the first fret to the second fret without picking it again.
  • Pull-offs: represented by a curved line with a small “p” above it, it means that you should pull off the string from the second fret to the first fret without picking it again.
  • Slides: represented by a diagonal line connecting two numbers, it means that you should slide your finger from the first fret to the second fret or from the second fret to the fourth fret, for example.
  • Bend: represented by an upward arrow or the letter “b,” it means that you should bend the string at a certain fret to create a pitch change.
  • Vibrato: represented by a wavy line, it means that you should slightly and quickly bend and release the string at a certain fret to create a vibrato effect.

Repeat Signs

Repeat signs are used to indicate that a specific section of the music should be repeated. The most common repeat sign is the double bar line with two dots on either side. This means that you should repeat the section of music between these two lines.

Chords

Chords are often written above the staff to indicate the chords that should be played during a specific section of the song. They are usually written as letters, such as “G” or “C,” and sometimes accompanied by additional symbols to indicate variations or embellishments.

source: youtube.com/@justinguitar

Understanding these different parts of a guitar tab is crucial to effectively read and play music. By paying attention to the staff, numbers, symbols, repeat signs, and chords, you’ll be able to accurately recreate your favorite songs on the guitar. With practice and dedication, reading guitar tabs will become second nature and you’ll be able to expand your repertoire of songs to play.

The Fundamental Differences Between Guitar Tablature and Standard Notation

When it comes to reading and writing music for the guitar, there are two primary forms of notation: tablature and standard notation. While both methods can convey the same musical information, there are some fundamental differences between the two that every guitarist should know. In this article, we’ll explore the key differences between guitar tablature and standard notation.

Guitar tablature, or “tab” for short, is a graphical representation of the guitar’s fretboard. Tab is typically written using six horizontal lines, each representing a string on the guitar. Numbers on these lines indicate which fret to play on that particular string. For example, a “0” on the top line would indicate playing the open string, while a “3” on the same line would indicate playing the third fret on that string. In contrast, standard notation is written on a five-line staff, with each line and space representing a specific pitch. The notes themselves indicate which fret to play, with additional symbols indicating how long to hold the note and other musical details.

The second key difference between tab and standard notation is their use of rhythm and timing. Standard notation uses symbols such as quarter notes, eighth notes, and rests to indicate the rhythm and timing of a piece of music. Tab, on the other hand, is generally less precise when it comes to rhythm. While some tabs may include rhythmic symbols, such as “x” or “h” to indicate a muted or hammered note, they are not as precise as standard notation in terms of indicating exact rhythms.

Another key difference between tab and standard notation is their use of musical notation symbols. Standard notation uses a wide variety of musical symbols to indicate everything from dynamics to articulations to tempo changes. In contrast, tab is much simpler, typically only using numbers and symbols such as “-” or “/” to indicate slides or bends. While this can make tab easier to read and understand for beginners, it can also limit its expressive capabilities when compared to standard notation.

One important thing to note is that while tab may be simpler and easier to read for some guitarists, it is not always the best choice for conveying certain types of music. For example, classical guitar music often uses intricate fingerpicking patterns and complex rhythms that may be difficult to accurately notate using tab alone. In these cases, standard notation may be a more appropriate choice.

In terms of ease of use, tab is often considered to be more beginner-friendly than standard notation. This is because tab is more intuitive when it comes to indicating which frets to play and where to play them on the guitar. However, learning to read standard notation is an important skill for any musician, and it can open up a wider range of musical opportunities.

Finally, it’s worth noting that while tab and standard notation may seem like two separate and distinct forms of notation, they are not necessarily mutually exclusive. In fact, many guitarists use both forms of notation in their playing and writing. For example, a guitarist may use tab to indicate which notes to play, but also use standard notation to indicate specific rhythms or musical details.

source: youtube.com/@Moveforwardguitar

While both tab and standard notation can be used to convey the same musical information, they have some fundamental differences in terms of their notation systems, use of rhythm and timing, musical notation symbols, and ease of use. Ultimately, the choice of which notation system to use will depend on the type of music being played or written, the skill level of the guitarist, and personal preference.

Exploring the History of Guitar Tablature: From Its Origins to Modern Use

Guitar tablature, or “tab,” has become an essential tool for guitarists around the world. It allows guitarists to quickly and easily notate the specific fingerings and techniques used in a song, making it easier for others to learn and play the same music. But where did guitar tablature come from, and how has it evolved over time? In this article, we’ll explore the history of guitar tablature, from its origins to modern use.

Origins of Guitar Tablature

Guitar tablature has its roots in medieval European music notation, which used letters to indicate the notes of a melody. As music notation developed, however, it became increasingly complex, with symbols to indicate rhythm, pitch, and duration. This made it difficult for non-musicians to read and understand, and led to the development of simplified notation systems.

One such system was called “tablature,” which used letters or numbers to indicate the frets and strings used to play a particular note. This system was used primarily for plucked string instruments like the lute and the guitar, and was popular throughout Europe in the Renaissance and Baroque periods.

Early Guitar Tablature

The earliest known examples of guitar tablature date back to the 16th century, and were written for the vihuela, a guitar-like instrument popular in Spain. These early tabs used a letter-based notation system, with the letters indicating the frets used to play each note.

As the guitar gained popularity in the 17th and 18th centuries, tablature became increasingly common for this instrument as well. However, the notation system evolved to include both letters and numbers, with the letters indicating the strings and the numbers indicating the frets.

Modern Guitar Tablature

Today, guitar tablature is used by guitarists around the world to notate their music. Modern tabs use a standardized notation system, which includes numbers to indicate frets and lines to indicate strings. This system is easy to read and understand, even for non-musicians, and has become an essential tool for guitarists of all levels.

Modern tabs may also include additional information such as chord diagrams, strumming patterns, and text annotations. These additional elements make it easier for guitarists to learn and play a song, and allow for greater customization and creativity in tab writing.

The Rise of Online Tablature

In recent years, online tablature has become increasingly popular. There are now hundreds of websites dedicated to guitar tablature, with tabs available for thousands of songs. This has made it easier than ever for guitarists to learn and play their favorite music, and has also created a thriving community of tab writers and enthusiasts.

However, online tablature has also raised concerns about copyright infringement, as many tabs are written by fans rather than the original artists or copyright holders. Some musicians and record labels have taken legal action against tab websites, arguing that the tabs violate their intellectual property rights.

Guitar tablature has come a long way since its origins in medieval Europe. From letter-based notation systems to modern standardized tabs, guitarists have developed a variety of ways to notate their music over the centuries. Today, guitar tablature is an essential tool for guitarists of all levels, allowing them to learn, play, and share their music with others around the world. While online tablature has created some legal challenges, it has also created a vibrant community of guitarists and tab writers, dedicated to sharing and promoting this beloved notation system.

Unlocking the Secrets of Guitar Tab Writing: Learn to Write Like a Pro

If you’re a guitarist who wants to write your own music, guitar tablature, or “tabs,” can be an invaluable tool. Tabs make it easy to notate the specific fingerings and techniques used in a song, so that other guitarists can replicate the sound. But while tabs may seem simple at first glance, there’s an art to writing them well. In this article, we’ll explore the secrets of guitar tab writing and give you the tools you need to write like a pro.

Start with a Clear Structure

Before you start writing your tab, it’s important to have a clear structure in mind. This means breaking down the song into its component parts, such as the verse, chorus, and bridge. Make sure to label each section clearly in your tab, and include any necessary repeats or breaks.

Use Standard Tab Notation

Guitar tabs use a standardized notation system, which includes numbers to indicate frets and lines to indicate strings. Make sure you’re familiar with this notation before you start writing your own tabs. It’s also important to be consistent in your use of notation, so that other guitarists can read and understand your tabs easily.

Notate the Rhythm and Timing

One of the trickiest parts of writing guitar tabs is notating the rhythm and timing of the song. To do this, you’ll need to include some additional symbols, such as dashes to indicate strums or palm mutes, and rests to indicate pauses in the music. It’s important to be as precise as possible with these symbols, so that other guitarists can play the song as it was intended.

Include Chord Diagrams

In addition to writing out the specific fingerings for each note in a song, it can also be helpful to include chord diagrams. Chord diagrams show the finger positions for a specific chord, so that guitarists can quickly and easily switch between chords as needed.

Use Text Annotations

Sometimes, there may be additional information that you want to convey in your tab, such as the type of guitar or tuning used in the song, or specific notes that should be emphasized. To do this, you can use text annotations, which are additional notes included alongside the tab itself.

Use Tab Software

While it’s possible to write guitar tabs by hand, there are also a number of software programs that can make the process much easier. Tab software allows you to quickly and easily notate tabs using a graphical interface, and often includes additional features such as chord diagrams and playback functionality.

Practice Reading and Writing Tabs

Finally, the key to becoming a proficient guitar tab writer is practice. Spend time reading and analyzing tabs for your favorite songs, and try writing your own tabs for songs you know well. Over time, you’ll develop a better understanding of what makes a good tab, and you’ll be able to write with greater speed and accuracy.

source: youtube.com/@TimTalksAudio

Guitar tab writing is an essential skill for any guitarist who wants to write their own music. By following these tips, you can unlock the secrets of guitar tab writing and learn to write like a pro. Whether you’re writing tabs for your own music, or sharing tabs with other guitarists online, these tips will help ensure that your tabs are clear, accurate, and easy to understand. So pick up your guitar, start practicing, and let your creativity flow!

Sliding Into Success: Tips and Tricks for Perfecting Guitar Slide Technique

source: pexels.com/@mati/

As a guitarist, you are always looking for ways to improve your skills and expand your repertoire. One technique that can add depth and flavor to your playing is guitar sliding. The slide technique involves sliding your fingers along the guitar strings to produce a smooth, gliding sound. In this article, we will explore the basics of guitar sliding and provide you with tips and tricks for perfecting your technique.

Getting Started with Guitar Slides

Before diving into the techniques of guitar sliding, it’s important to have the right equipment. You will need a slide, which is a small tube made of metal, glass, or ceramic that fits over your finger. You can choose between different materials and sizes depending on your preferences and the sound you want to achieve.

Once you have your slide, it’s time to practice. Start by placing the slide on your finger and gently placing it over the strings. You want to make sure the slide is perpendicular to the frets and the strings are touching the slide evenly. It may take a few tries to get it right, so be patient and keep practicing.

Guitar Slide Techniques

Now that you have the basics down, it’s time to explore some guitar slide techniques. Here are some tips and tricks for perfecting your slide technique:

  1. Practice on the higher frets first. Sliding on the higher frets is easier than on the lower frets because the strings are tighter and require less pressure. Once you have mastered the higher frets, you can move on to the lower frets.
  2. Use vibrato to add depth and emotion to your playing. Vibrato involves bending the note slightly up and down while sliding, creating a vibrational effect. This technique can add a lot of depth and emotion to your playing.
  3. Experiment with different finger positions. You can use different fingers to hold the slide, depending on the sound you want to achieve. For example, using your pinky finger can produce a brighter, more cutting sound.
  4. Play with different pressure and speed. Varying the pressure and speed of your slide can produce different sounds and effects. Experiment with different combinations to find the ones that work best for you.
  5. Practice with backing tracks. Practicing with backing tracks can help you improve your timing and accuracy. You can find backing tracks online or create your own.
source: youtube.com/@sweetwater

Common Mistakes to Avoid

While guitar sliding can add a lot of depth and flavor to your playing, it’s important to avoid some common mistakes. Here are some things to watch out for:

  1. Placing the slide too close to the fret. If you place the slide too close to the fret, it can produce a buzzing sound. Make sure the slide is placed in the middle of the fret to avoid this.
  2. Pressing too hard. Pressing too hard can produce a muffled sound. Remember to keep a light touch and let the slide do the work.
  3. Sliding too fast. Sliding too fast can make the notes sound sloppy and out of control. Start slow and gradually increase your speed as you become more comfortable with the technique.
  4. Not muting the strings. When sliding, it’s important to mute the strings that you are not playing. This can be done with your picking hand or by lightly touching the strings with your fretting hand.

Guitar sliding is a technique that can add depth and flavor to your playing. By practicing the techniques outlined in this article and avoiding common mistakes, you can master the art of guitar sliding and take your playing to the next level. Remember to experiment with different techniques and have fun!

Bending Notes on Guitar: Techniques and Exercises for Improving Your Pitch Control

Bending notes is a fundamental technique that every guitarist must learn. By bending the strings, you can create expressive and emotive sounds that add depth to your playing. However, bending notes can be tricky to master, and it takes time and practice to develop the necessary control and precision.

In this article, we will explore the techniques and exercises you can use to improve your pitch control and enhance your bending skills.

guitar bending
source: pexels.com/@kelly-1179532

The Basics of Bending

Before we delve into the techniques and exercises, let’s start with the basics of bending. Bending is achieved by pushing or pulling the string across the fretboard to raise or lower the pitch of the note. Bends can be either half-step or whole-step, depending on how far you bend the string.

To execute a bend, start by fretting the note you want to bend. Then, place your other fingers behind the fretting finger to provide support. Use your fretting hand to push or pull the string towards the ceiling or the floor, depending on whether you want to raise or lower the pitch. As you bend the string, use your ear to guide you and aim for the desired pitch.

Techniques for Improving Your Bending

Now that we’ve covered the basics let’s explore some techniques for improving your bending:

  1. Practice Slowly: When starting with bends, begin by practicing slowly to build muscle memory and develop precision. Take your time to get comfortable with the motion of bending and develop the necessary finger strength.
  2. Use Your Ear: Bending requires a good sense of pitch, so use your ear to guide you. Listen closely to the note you want to bend to and aim for the desired pitch. You can also use a tuner to check if you’re hitting the right pitch.
  3. Keep Your Fingers Close to the Fretboard: To achieve clean and precise bends, keep your fingers as close to the fretboard as possible. This will help prevent unwanted noise and buzzing.
  4. Apply Pressure with Your Fingertips: When bending, apply pressure with your fingertips rather than the pads of your fingers. This will give you more control over the string and help you achieve more precise bends.
  5. Use Vibrato to Enhance Your Bends: Vibrato is a technique that involves oscillating the pitch of a note. Use vibrato after bending to enhance the expressive quality of your playing.
source: youtube.com/@justinguitar

Exercises for Improving Your Bending

Now that we’ve explored some techniques let’s move onto exercises that will help you improve your bending:

  1. Whole-Step Bends: Start by practicing whole-step bends. Play a note and bend it up a whole-step (two frets). Hold the bent note for a few seconds, then release it back to its original pitch. Repeat this exercise on different strings and frets to build muscle memory.
  2. Half-Step Bends: Once you’re comfortable with whole-step bends, move onto half-step bends (one fret). Practice bending up and down on different strings and frets, using your ear to guide you.
  3. Pre-Bends: A pre-bend involves bending a note before playing it. Start by fretting a note, bending it up a whole-step, and then picking it. This exercise will help you develop control over your bends and improve your accuracy.
  4. Bend and Release: This exercise involves bending a note up a whole-step, holding it for a few seconds, and then releasing it back to its original pitch. Repeat this exercise on different strings and frets to build finger strength and control.

Bending notes on guitar is a technique that can add emotion and dynamics to your playing. To master this technique, it is important to understand the basic mechanics of bending, warm up your fingers, practice different techniques and exercises, and pay attention to the sound of your notes. With time and practice, you can develop better pitch control and finger strength, and create a more expressive and dynamic sound on the guitar.