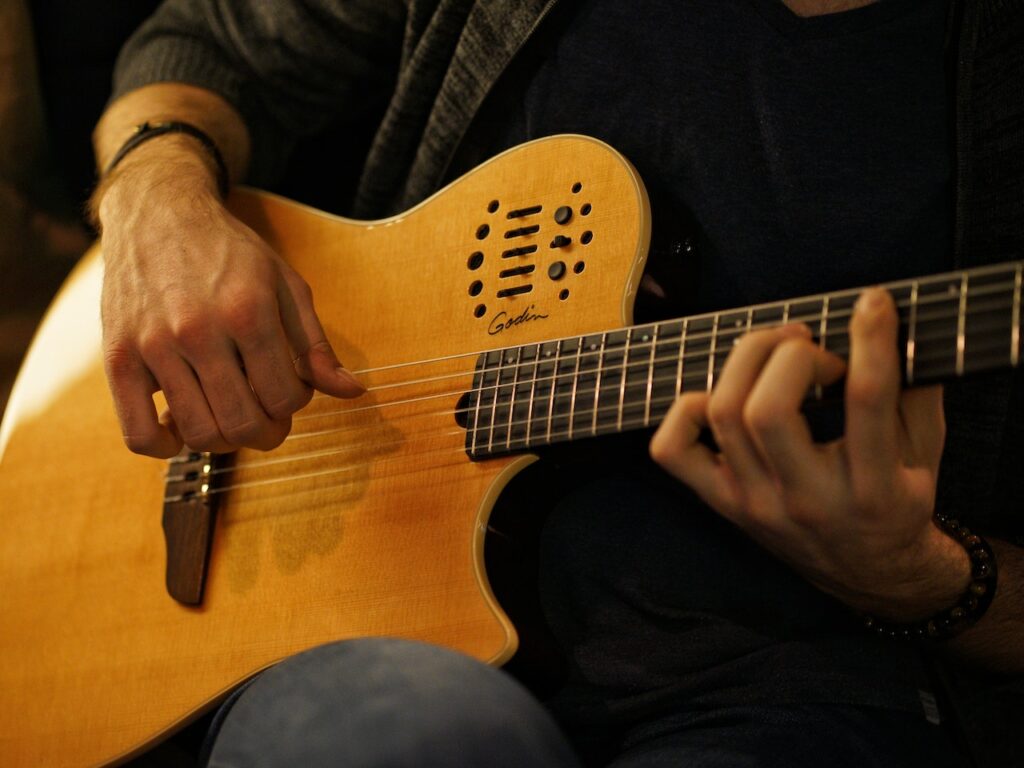
The Benefits of Learning Guitar Tablature

Learning to play guitar is art itself since it allows individuals to express themselves creatively but it can be a challenging yet rewarding experience, and for many aspiring guitarists, understanding and utilizing guitar tablature can greatly improve their playing. Guitar tablature, or “tab” for short, is a form of musical notation that is widely used in the guitar community. In this article, we will explore the benefits of learning guitar tablature and how it can help you improve your guitar playing skills.

Easy to read and understand

One of the main benefits of guitar tablature is its ease of use. Unlike traditional sheet music, which requires knowledge of music theory and notation, guitar tablature uses simple numbers and symbols to represent the frets and strings on the guitar. This makes it easy for beginners to quickly learn and understand how to play songs on the guitar.

Access to a wide range of music

Another advantage of guitar tablature is the sheer amount of music available. Tablature is widely used across a variety of genres, from rock and metal to folk and blues. With so many tabs available online and in guitar books, you can learn to play your favorite songs with ease.

Improves your ear training

Reading guitar tablature can also improve your ear training, or the ability to recognize and reproduce musical notes and phrases. By reading tablature, you can train your ear to recognize different guitar techniques, such as hammer-ons, pull-offs, and bends. This can help you develop a more nuanced and expressive playing style.

Enables you to learn at your own pace

Guitar tablature also enables you to learn at your own pace. Unlike sheet music, which requires you to play at a specific tempo, tablature allows you to play at your own speed. This is particularly useful for beginners who may need to spend more time on certain sections of a song before moving on.

Learning guitar tabs can be an exciting way to explore new songs and entertain yourself while honing your guitar skills. With guitar tabs, you can easily follow along and play your favorite tunes, providing endless hours of entertainment.

Helps you to understand guitar techniques

In addition to helping you learn songs, guitar tablature can also help you understand different guitar techniques. By studying tablature, you can learn how to play specific guitar riffs, licks, and solos, as well as understand how they are constructed. This can help you develop your own playing style and improve your overall guitar technique.

source: youtube.com/@creativeguitarstudio

Learning guitar tablature is an essential skill for any aspiring guitarist. It is easy to read and understand, provides access to a wide range of music, improves your ear training, enables you to learn at your own pace, and helps you to understand different guitar techniques. By incorporating guitar tablature into your practice routine, you can take your playing to the next level and become a more proficient guitarist.

Learning to play the guitar is a transformative journey that opens up a world of musical possibilities. Renowned music schools like Berklee College of Music and the New England Conservatory have become sanctuaries for aspiring guitarists, offering exceptional educational programs, renowned faculty, and an inspiring environment for growth. These renowned music schools offer a transformative experience that enables guitarists to unlock their full musical potential. By providing world-class faculty, diverse learning opportunities, performance platforms, and a focus on entrepreneurial skills, these institutions continue to shape the next generation of talented guitarists who will leave an indelible mark on the music industry.

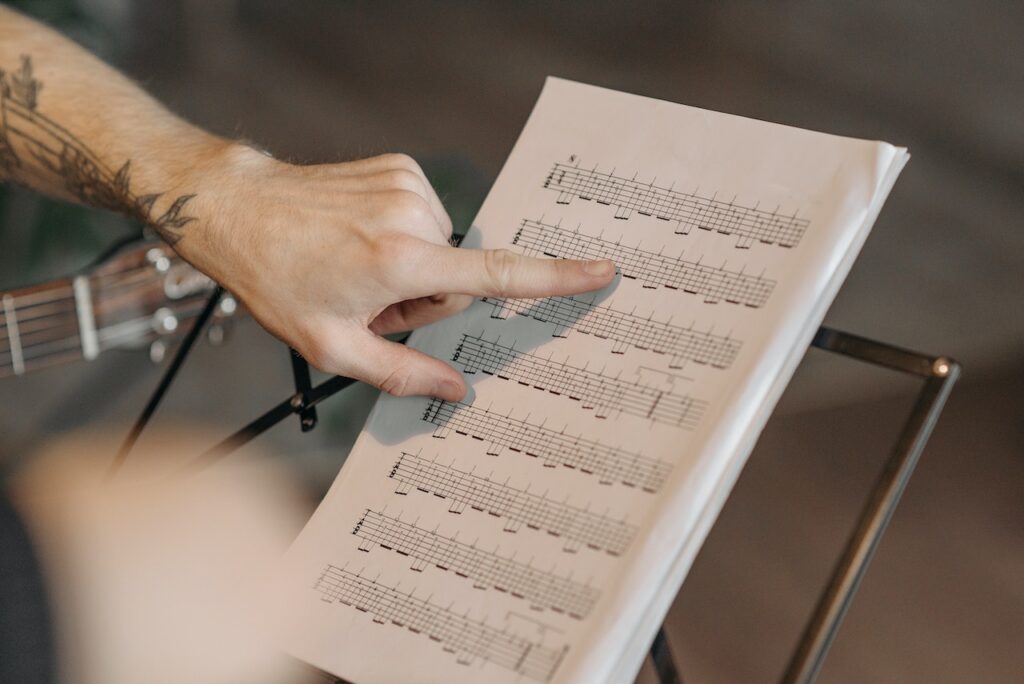
Navigating Guitar Tablature: A Guide to Common Notation Conventions

For guitarists, whether beginners or experienced players, tablature (or tabs) is an invaluable tool for learning and playing music on the guitar. Unlike traditional sheet music, which uses standard notation, guitar tabs provide a simplified and guitar-specific method of notation. While tabs are relatively straightforward, there are common notation conventions within them that are important to understand. In this comprehensive guide, we’ll navigate the world of guitar tablature, shedding light on the common notation conventions and helping you become a more proficient tab reader and player.

The Basics of Guitar Tabs

Before delving into common notation conventions, let’s briefly touch on the foundational elements of guitar tabs:

  1. The Staff: A typical guitar tab consists of a set of horizontal lines, representing the guitar strings. These lines can range from four to seven, but the most common tablature has six lines, one for each string of the standard-tuned guitar.
  2. Numbers: Numbers placed on the lines indicate which fret to press and play on the respective string. “0” often represents an open string, while other numbers guide you to frets.
  3. String Indications: The order of the lines, from top to bottom, represents the strings of the guitar, starting with the high E string at the top and the low E string at the bottom.

Now, let’s explore the common notation conventions in greater detail.

1. Repeats and Endings

Guitar tabs often feature repeat signs that indicate specific sections of a song should be played more than once. The most common symbols for repeats are “||” (double bar lines), “:[number]” (indicating how many times to repeat), and “|:” (beginning of a repeated section). At the end of the repeated part, you’ll find “:|” (end of a repeated section).

2. Time Signatures

While less common in guitar tabs than in sheet music, you may come across time signatures. These are written as a fraction (e.g., 4/4) and provide information about the song’s timing and rhythm.

3. Chord Diagrams

In tabs, chord diagrams are used to indicate chords to be played at specific points in the song. They consist of a grid with dots, which represent finger positions on the fretboard. Learning to read chord diagrams is essential for playing chord progressions accurately.

4. Slides, Bends, and Other Techniques

Tabs use various symbols to represent different guitar techniques:

  • Slides: Slides are depicted with a diagonal line connecting two notes. They signify that you should slide your finger from one fret to another without lifting it off the string.
  • Bends: Bends are indicated by an upward arrow, a “b,” or the abbreviation “½” (for a half-step bend). These symbols show that you should bend the string at a specific fret to raise its pitch.
  • Hammer-ons and Pull-offs: These techniques are usually shown with curved lines connecting two notes. A hammer-on indicates that you should play a note and then tap your finger on the next fret, while a pull-off indicates you should lift your finger off the string to sound the next note.
  • Vibrato: Vibrato is represented by a wavy line or the letter “v” above a note, indicating that you should apply vibrato to that note.

5. Palm Muting

Palm muting is commonly used in rock and metal music. In tabs, it’s denoted by the letter “P” above the note you should palm mute. To execute a palm mute, lightly rest the palm of your hand on the strings near the bridge while picking the note.

6. Dynamics and Articulations

While guitar tabs are less detailed than sheet music, they sometimes include dynamic and articulation symbols. Common symbols include “p” (soft or quiet), “f” (loud), “s” (slap), and “h” (harmonic). These symbols provide some guidance on how to play certain notes.

7. Grace Notes

Grace notes, or small decorative notes, are sometimes used in tabs. They are typically smaller and not connected to the main notes. Grace notes are usually played quickly and add embellishments to the music.

8. Barre Chords and Capo Notations

Tabs may include indications for using barre chords or capos. Barre chords are depicted with a curved line over the fret number to show that you should bar all the strings at that fret. Capo notations indicate the fret at which a capo should be placed.

9. Fingerpicking Patterns

For fingerstyle guitarists, fingerpicking patterns may be notated in tabs. These patterns show which fingers to use on which strings.

10. Left-Hand and Right-Hand Fingerings

In more advanced tabs, you might encounter left-hand (fretting hand) and right-hand (picking hand) fingerings. These indicate which fingers to use on the fretboard and picking pattern details.

Now that we’ve explored these common notation conventions in guitar tabs, let’s discuss why they are essential and how they can help you become a better guitarist.

The Importance of Understanding Common Notation Conventions in Tabs

  1. Accuracy: Accurate interpretation of notation conventions ensures you play the right notes and execute techniques correctly.
  2. Communication: Tabs often use notation conventions to convey specific instructions. Knowing how to read and understand them is crucial for effective communication.
  3. Expressiveness: Understanding articulation, dynamics, and techniques allows you to infuse your playing with expression and emotion.
  4. Versatility: Proficiency in reading tabs with various notation conventions makes you a more versatile guitarist, capable of playing a wide range of music styles.
  5. Collaboration: When playing with other musicians, knowing notation conventions helps you follow and communicate musical ideas effectively.

How to Improve Your Tab Reading Skills

  1. Practice Regularly: The more you read and play tabs, the more familiar you’ll become with common notation conventions.
  2. Listen Actively: Use your ear to listen to the song you’re playing along with. It will help you understand the rhythm and dynamics even when they’re not explicitly notated.
  3. Study Specific Techniques: If you’re struggling with certain techniques (e.g., slides or bends), find resources and tutorials that focus on those techniques to improve your skills.
  4. Play Along with Music: Practicing along with the actual song can help you get a sense of how the tab’s notation conventions align with the music.
  5. Transcribe Music: Try transcribing songs you like from recordings into tabs. This exercise will strengthen your ear and tab reading skills.
source: youtube.com/@rainydaystudio77

Navigating guitar tablature is an essential skill for any guitarist. While tabs are generally easier to read than traditional sheet music, understanding common notation conventions within them is critical for precise and expressive playing. By mastering these conventions, you can expand your repertoire, communicate effectively with other musicians, and bring a new level of expression to your guitar playing. Practice regularly, actively listen to music, and seek out resources to improve your tab reading skills, and you’ll find that the world of guitar tabs becomes a rich and accessible resource for your musical journey.

Chord Diagrams in Guitar Tabs: Essential Tools for Guitarists

Guitar playing is an art that encompasses a wide range of styles, techniques, and skills. As you embark on your journey to become a skilled guitarist, one essential tool you’ll encounter in your repertoire is the chord diagram within guitar tabs. Chord diagrams are visual representations of specific chords and are invaluable for any guitarist, whether you’re a beginner or a seasoned pro. In this comprehensive guide, we will explore the importance and utility of chord diagrams in guitar tabs, helping you understand their significance and how to make the most of them.

The Basics of Guitar Tabs

Before diving into chord diagrams, it’s important to understand the basics of guitar tabs. Guitar tablature, commonly known as “tabs,” is a form of musical notation specific to the guitar. It utilizes a system of lines to represent the strings of the guitar, with numbers indicating the frets where you should place your fingers.

For instance, when you see a “0” on the high E string (the thinnest string), it means to play the open string without pressing down any frets. On the other hand, if you see a “3” on the same string, it instructs you to place your finger on the third fret of the high E string. This system is fantastic for indicating individual notes and melodies, but it doesn’t tell you much about chords.

What Are Chord Diagrams in Guitar Tabs?

Chord diagrams, often found in guitar tabs, are visual representations of guitar chords. They offer a clear and concise way of illustrating how to play a specific chord on the guitar. Chord diagrams consist of a grid, with vertical lines representing the guitar strings and horizontal lines indicating the frets. Dots or numbers within this grid reveal where you should place your fingers to form the chord.

The Significance of Chord Diagrams

Chord diagrams are essential tools for guitarists for several reasons:

  1. Quick Reference: Chord diagrams provide an immediate reference for how to play a chord. Instead of reading through a chord’s note-by-note tab, you can quickly grasp the fingering positions.
  2. Chord Voicings: Chord diagrams depict different voicings or variations of a chord. This allows you to choose the voicing that best fits the song or your playing style.
  3. Chord Progressions: Chord diagrams can help you see and understand chord progressions more easily. They enable you to transition from one chord to another efficiently.
  4. Song Learning: When learning a new song, having the chord diagrams alongside the tab can streamline the learning process. You can see the chords you’ll be using and easily incorporate them into your playing.
  5. Playing with Others: Chord diagrams are particularly helpful when playing with others. They ensure that everyone is on the same page regarding which chords are being used in a song.

How to Read Chord Diagrams

Understanding and reading chord diagrams is relatively straightforward. Let’s break down the key components:

  1. The Grid: The grid represents the fretboard. The vertical lines represent the strings, with the leftmost line typically representing the low E string, and the rightmost line representing the high E string. The horizontal lines denote the frets.
  2. Dots or Numbers: Inside the grid, you’ll find dots or numbers. These indicate where to place your fingers. A “0” or an “X” means that you don’t press down on that string. A number corresponds to the fret where you should place your finger.
  3. Numbers on Strings: Sometimes, chord diagrams also include numbers below the grid, representing the fingers you should use for each string. Typically, “1” is the index finger, “2” is the middle finger, “3” is the ring finger, and “4” is the pinky.

Making the Most of Chord Diagrams

To effectively use chord diagrams in guitar tabs, consider the following tips:

  1. Learn the Basics: Understand the basics of chord construction. Know how to read the chord name, the fingering, and the positioning on the fretboard.
  2. Practice Transitioning: Work on transitioning between chords smoothly. Focus on changing from one chord to another in the context of a song.
  3. Use Online Resources: There are many online resources that provide chord diagrams for a wide range of songs. These resources are invaluable for learning new songs and expanding your chord vocabulary.
  4. Experiment with Voicings: Chord diagrams offer multiple voicings for the same chord. Experiment with different voicings to find the one that suits your playing style or the song you’re working on.
  5. Integrate with Tabs: Often, you’ll find tabs and chord diagrams in the same song sheet. Learn to read and use both simultaneously to get a more complete picture of the music.
source: youtube.com/@RedlightBlue

Chord diagrams in guitar tabs are indispensable tools for guitarists of all levels. They provide a clear and concise way to understand and play chords, making them a vital resource for learning songs, creating your music, and playing with others. By mastering the art of reading and using chord diagrams, you’ll enhance your guitar-playing skills and open up new musical possibilities.

Beyond the Basics: How to Infuse Creativity into Guitar Tablature

Guitar tablature, or “tab,” is an essential tool for guitarists of all levels. It provides a visual representation of where to place your fingers on the fretboard and which strings to play. While tabs are often used for learning and playing songs, they can be a powerful platform for musical creativity and personal expression. In this article, we will explore how to go beyond the basics and infuse creativity into your guitar tablature.

  1. Understand the Basics First

Before diving into creative tablature, it’s crucial to have a solid understanding of the basics. Make sure you can read tabs accurately and have the necessary technical skills to execute the tab you’re working on. This foundational knowledge will give you the freedom to explore more creative aspects.

  1. Create Your Arrangements

One of the most creative ways to use guitar tablature is by arranging songs in your unique style. Take existing songs and create your arrangements, incorporating variations, fingerstyle patterns, and harmonies. This allows you to put your personal stamp on the music you love.

  1. Experiment with Chord Inversions

Chord inversions involve changing the order of the notes within a chord. Experiment with different chord inversions in your tablature to create fresh and unique sounds. This can add complexity and richness to your playing, especially when working with open chords.

  1. Add Articulations and Dynamics

To infuse emotion into your tablature, incorporate articulations and dynamics. Use symbols to indicate legato (smooth and connected) or staccato (short and detached) playing. Experiment with crescendos, decrescendos, and other dynamic markings to convey the music’s mood.

  1. Embrace Percussive Techniques

Percussive techniques, such as slapping, tapping, and percussive strumming, can add a rhythmic and percussive element to your guitar tablature. These techniques work exceptionally well in acoustic and fingerstyle playing, creating a captivating and unique texture.

  1. Use Harmonics Creatively

Harmonics produce bell-like tones by lightly touching the strings at specific nodal points. Experiment with artificial harmonics, pinch harmonics, and natural harmonics to create ethereal and magical effects in your tablature.

  1. Incorporate Slides and Bends

Slides and bends are expressive techniques that can be used creatively in your tablature. Consider sliding into and out of notes, using unison bends, or bending a note while simultaneously plucking another string. These techniques add personality and style to your playing.

  1. Experiment with Altered Tunings

Altered tunings, where you adjust the standard tuning of your guitar, open up new creative possibilities. Many iconic songs were written using altered tunings, and they can inspire fresh ideas in your tablature.

  1. Layer Your Parts

Create depth in your guitar tablature by layering different parts. You can have a melody line, harmonies, and a bassline all within the same tab. This approach works exceptionally well in fingerstyle playing.

  1. Collaborate with Other Musicians

Collaborating with other musicians, including vocalists, percussionists, or other instrumentalists, can spark creativity in your guitar tablature. Their input can bring new ideas and dimensions to your music.

  1. Learn Music Theory

While it may sound daunting, having a basic understanding of music theory can be immensely helpful in creative tablature. It allows you to make informed choices about chord progressions, key changes, and harmony.

  1. Transcribe and Analyze Music

Transcribing music from other instruments or genres can inspire creative ideas for your guitar tablature. Analyze the music you transcribe to understand what makes it unique and incorporate those elements into your playing.

  1. Trust Your Ears and Emotions

Ultimately, the most critical aspect of creative tablature is trusting your ears and emotions. Music is a form of personal expression, and if a certain note or passage feels right to you, it’s valid. Creativity often comes from following your instincts and allowing your emotions to guide your playing.

source: youtube.com/channel/UCzH6dRR6bpvOQY5uMmBg1Sg

Guitar tablature is a canvas for your musical creativity. By going beyond the basics and incorporating various techniques, styles, and personal expressions, you can take your guitar playing to new heights. Remember that creativity is a journey, and the more you explore, experiment, and push your boundaries, the more your guitar tablature will become a unique reflection of your musical identity.

Mastering Rhythm Techniques: A Guide for Guitarists

Rhythm is the heartbeat of music. It’s the driving force that propels a song forward, gives it energy, and connects with listeners on a visceral level. For guitarists, mastering rhythm techniques is essential not only for playing with precision but also for creating a musical groove that captivates the audience. In this comprehensive guide, we’ll delve into the world of rhythm techniques for guitarists, exploring the fundamentals, advanced concepts, and practical tips that will elevate your playing to new heights.

The Importance of Rhythm in Guitar Playing

Before we dive into specific techniques, let’s understand why rhythm is so crucial for guitarists. Rhythm encompasses several aspects:

  1. Timing: Good timing keeps a song cohesive and danceable. It’s the difference between a melody that soars and one that stumbles.
  2. Groove: Groove is the irresistible pulse that makes you tap your foot or nod your head. A well-developed groove can make a song infectious.
  3. Expressiveness: Rhythm is a tool for emotional expression. Slowing down or speeding up a passage can convey feelings of tension, excitement, or relaxation.
  4. Dynamic Playing: Rhythmic dynamics, such as accents and staccato notes, add depth and contrast to your guitar playing.

Basic Rhythm Techniques

1. Strumming Patterns:

  • Begin with simple strumming patterns using downstrokes and upstrokes.
  • Practice common patterns like the down-down-up-up-down-up (D-D-U-U-D-U) strum.

2. Basic Chord Progressions:

  • Learn foundational chord progressions, such as the I-IV-V in major keys or the i-iv-VII in minor keys.
  • Experiment with changing chords smoothly and in time.

3. Metronome Practice:

  • A metronome is your best friend for developing timing. Start slow and gradually increase the tempo as you become comfortable.

4. Counting Rhythms:

  • Learn to count rhythms by subdividing beats (e.g., eighth notes, sixteenth notes).
  • Practice counting while playing to develop a strong internal sense of timing.

Advanced Rhythm Techniques

1. Syncopation:

  • Syncopation involves emphasizing off-beat rhythms, creating a sense of surprise and movement in your playing.
  • Experiment with syncopated strumming patterns and melodies.

2. Palm Muting:

  • Palm muting involves lightly resting the palm of your hand on the strings near the bridge to create a percussive, muted sound.
  • Use palm muting to add a rhythmic punch to your playing.

3. Rhythmic Displacement:

  • Try shifting the emphasis of a rhythm to unexpected beats or subdivisions.
  • This technique can add complexity and interest to your guitar parts.

4. Polyrhythms:

  • Polyrhythms involve playing multiple rhythms simultaneously. For instance, you might play triplets in your right hand and eighth notes in your left hand.
  • Polyrhythms can create a hypnotic and intricate rhythmic texture.

Practical Tips for Mastering Rhythm

  1. Listen Actively: Pay close attention to the rhythm in the music you love. Try to replicate complex rhythms you hear in songs.
  2. Practice Slowly: When learning a new rhythm, start at a slow tempo and gradually increase it as you gain confidence.
  3. Use a Metronome: Incorporate metronome practice into your routine to improve timing.
  4. Record Yourself: Recording your playing allows you to objectively assess your rhythm and timing.
  5. Jam with Others: Playing with other musicians, especially drummers and bassists, can help solidify your sense of rhythm.
  6. Explore Different Styles: Different music styles (e.g., blues, funk, reggae) offer unique rhythmic challenges. Experiment with diverse genres to broaden your rhythmic vocabulary.
  7. Transcribe Rhythms: Transcribing rhythms from songs you love is an excellent way to internalize complex patterns.
source: youtube.com/@BrettPapa

Mastering rhythm techniques is an ongoing journey for guitarists. It’s not only about precision but also about injecting your playing with emotion, groove, and dynamics. With dedicated practice and a willingness to explore various rhythmic concepts, you can transform your guitar playing into a rhythmic powerhouse that captivates audiences and fellow musicians alike. So, pick up your guitar, tap into the heartbeat of music, and start mastering those rhythm techniques today.

Mastering Guitar Harmonics: Techniques and Tips

Harmonics on the guitar are magical. They produce those ethereal, bell-like tones that add a touch of brilliance to your playing. Whether you’re a beginner or an experienced guitarist, mastering harmonics can take your skills to the next level and add a new dimension to your music. In this comprehensive guide, we will explore the world of guitar harmonics, covering techniques, tips, and practical advice to help you master this beautiful aspect of guitar playing.

Understanding Harmonics

Before delving into techniques, it’s crucial to understand what harmonics are. Harmonics are a phenomenon produced when you lightly touch a string at specific nodal points while plucking it. These nodal points are divisions of the string length that correspond to simple fractions. The most commonly used harmonics are the natural harmonics, which occur at the 12th, 7th, and 5th frets.

  • 12th Fret Harmonic: This harmonic divides the string into two equal parts. It produces the highest-pitched harmonic, usually referred to as the “octave” harmonic.
  • 7th Fret Harmonic: Dividing the string into three equal parts, this harmonic produces a tone one octave and a perfect fifth higher than the fundamental note.
  • 5th Fret Harmonic: This harmonic divides the string into four equal parts, creating a tone two octaves above the fundamental note.

Now that we have a basic understanding, let’s explore techniques to master these harmonics.

Techniques for Mastering Harmonics

1. Proper Plucking Technique

To produce clean harmonics, your plucking technique is essential. Use your index finger (for downstrokes) or thumb (for upstrokes) of your picking hand to lightly touch the string right above the desired harmonic point. It should be a gentle touch, almost like brushing the string.

2. Precise Left-Hand Placement

For accurate harmonics, your left hand should be precise. Hover your finger over the harmonic point without pressing down on the string. Keep your finger slightly touching the string’s surface.

3. Use Light Pressure

The pressure you apply with your picking hand is crucial. It should be just enough to create the harmonic tone without muting the string. Experiment with varying degrees of pressure to find the sweet spot.

4. Experiment with Different Strings

While the 5th, 7th, and 12th fret harmonics are the most common, don’t limit yourself. Experiment with other frets and strings to discover unique harmonics. You’ll find harmonics at the 4th, 9th, and even 24th frets.

5. Artificial Harmonics

Beyond natural harmonics, you can also explore artificial harmonics. These involve fretting a note with your left hand and simultaneously plucking a harmonic with your picking hand. They create a distinctive sound and can be used for melodic and atmospheric effects.

6. Practice Scales and Melodies

Incorporate harmonics into your practice routine. Play scales, arpeggios, and melodies using harmonics. This will not only improve your technique but also enhance your musicality.

Tips for Mastering Guitar Harmonics

1. Start Slowly

When learning harmonics, start at a slow tempo. Focus on precision and clarity before increasing speed.

2. Cleanliness Matters

Ensure your guitar is properly intonated and set up. Clean strings and a well-maintained guitar will produce better harmonics.

3. Experiment with Dynamics

Explore the dynamics of harmonics. Try playing them softly for a subtle, dreamy effect, or pluck them more forcefully for a brighter, chime-like sound.

4. Record Yourself

Recording your practice sessions can be enlightening. It allows you to hear how your harmonics sound objectively and identify areas for improvement.

5. Listen and Learn

Listen to songs by guitarists known for their harmonic techniques, like Eddie Van Halen or Steve Vai. Analyze their approach and incorporate their ideas into your playing.

6. Be Patient

Mastering harmonics takes time and patience. Don’t get discouraged if you don’t achieve perfection immediately.

source: youtube.com/@i.g

Mastering guitar harmonics can be a rewarding journey for any guitarist. These techniques add a unique and captivating dimension to your music, allowing you to express yourself in new ways. Remember, practice is key to mastering any guitar technique, so dedicate time to harmonics in your routine. With patience, precision, and a touch of creativity, you’ll unlock the mesmerizing world of guitar harmonics and elevate your playing to new heights.

String Skipping 101: A Comprehensive Tutorial for Guitarists

String skipping is a versatile and exciting technique that can take your guitar playing to the next level. It adds a unique flavor to your melodies and solos, creating captivating sounds that can grab the listener’s attention. In this comprehensive tutorial, we’ll explore the art of string skipping, covering the basics, techniques, exercises, and practical tips to help guitarists master this technique.

Understanding String Skipping

String skipping is a technique where you intentionally avoid playing adjacent strings while picking or fingerpicking. This creates an interesting and unconventional sound as you jump from one string to another, skipping over one or more strings in between. String skipping can be applied to various musical styles, from rock and metal to country and jazz.

Benefits of String Skipping

  1. Unique Sound: String skipping adds a fresh and unique sound to your guitar playing, making your melodies stand out.
  2. Enhanced Speed: It can increase your speed and dexterity, as it requires precise coordination between your fretting and picking (or fingerpicking) hands.
  3. Expressive Playing: String skipping allows for more expressive and creative playing, enabling you to experiment with different note combinations and patterns.
  4. Challenging Technique: It offers a challenge for intermediate and advanced players who want to expand their skill set and musical vocabulary.

Getting Started with String Skipping

1. Finger Positioning

  • Start by placing your fretting hand’s fingers lightly on the strings to mute them.
  • Use the tips of your fingers to fret the notes, and keep your thumb behind the neck for better control.

2. Pick or Fingerpick Hand Technique

  • If you’re using a pick, maintain a consistent up-and-down picking motion.
  • For fingerpicking, assign a finger to each string you’re playing to ensure clarity and precision.

3. Start Slow

  • Begin with simple patterns and slow tempos to build accuracy and control.
  • Gradually increase the tempo as you become more comfortable with the technique.

String Skipping Exercises

Exercise 1: Basic String Skipping

Start with a simple exercise by playing the following pattern:

e|------------------|------------------|
B|------------------|------------------|
G|------------------|------------------|
D|---2---4---5---7--|---2---4---5---7--|
A|------------------|------------------|
E|------------------|------------------|
  • Use alternate picking or fingerpicking for this exercise.
  • Focus on keeping your picking hand’s motion smooth and controlled.

Exercise 2: Ascending and Descending

Expand your skills with an ascending and descending pattern:

e|------------------|------------------|
B|------------------|------------------|
G|------------------|------------------|
D|---2---4---5---7--|---7---5---4---2--|
A|------------------|------------------|
E|------------------|------------------|
  • Pay attention to the changes in direction and string skipping.

Exercise 3: Combining Techniques

Incorporate hammer-ons and pull-offs into your string skipping:

e|——————|——————|
B|——————|——————|
G|—4h5p4—4h5p4–|—4h5p4—4h5p4–|
D|——————|——————|
A|——————|——————|
E|——————|——————|

  • This exercise introduces legato techniques, enhancing your playing style.

Practical Tips

  1. Use a Metronome: Practicing with a metronome helps improve your timing and rhythm while string skipping.
  2. Experiment with Patterns: Create your patterns and sequences to develop your unique style and sound.
  3. Apply to Songs: Incorporate string skipping into songs you’re learning or composing to add flair to your playing.
  4. Record Yourself: Recording your practice sessions allows you to track your progress and identify areas for improvement.
  5. Stay Patient: String skipping can be challenging, so be patient and persistent in your practice.
source: youtube.com/@theguitarnoobph

Taking Your Playing to the Next Level

String skipping is a captivating technique that can elevate your guitar playing to new heights. Whether you’re a rock enthusiast, a jazz aficionado, or a blues player, mastering string skipping opens doors to creative and expressive playing. Remember, practice and dedication are the keys to proficiency. So, pick up your guitar, start with the basics, and gradually incorporate string skipping into your repertoire. With time and effort, you’ll unlock its full potential and enhance your musical journey.

Hybrid Picking Techniques: Enhance Your Playing with Hybrid Picking

Hybrid picking is a versatile guitar technique that combines the use of a pick and fingers to pluck the strings. It offers a wide range of possibilities for guitarists, allowing them to create complex patterns, add texture to their playing, and expand their overall musicality. In this article, we will delve into hybrid picking techniques and explore how you can enhance your playing by incorporating this technique into your repertoire.

What is Hybrid Picking?

Hybrid picking involves using the pick held between the thumb and index finger, while simultaneously using the remaining fingers to pluck the strings. This technique provides greater control and allows for a combination of pick attack and fingerstyle precision. By utilizing both the pick and fingers, guitarists can achieve a unique tonal quality and perform various techniques with greater ease.

Developing Finger Independence

To excel in hybrid picking, it is essential to develop finger independence. Start by practicing finger exercises that target individual fingers and gradually work on coordinating the movements of the pick and fingers. This will improve your dexterity and allow for smoother transitions between picking methods.

Combining Pick and Finger Patterns

One of the advantages of hybrid picking is the ability to combine pick and finger patterns. Experiment with alternating between pick strokes and finger plucking, and explore different combinations to create interesting and intricate musical phrases. For example, you can use the pick for power chords or single-note lines while simultaneously plucking a melody with your fingers.

Expanding Your Technique Repertoire

Hybrid picking opens up a world of new possibilities in terms of techniques. Some common hybrid picking techniques include:

  • Chicken picking: Derived from country music, this technique involves a combination of pick and fingerstyle playing to achieve a distinct “chicken-like” sound.
  • Pinch harmonics: By using the thumb or side of the pick to lightly touch the string immediately after picking it, you can produce harmonics with a unique and expressive quality.
  • Sweeping: Incorporating sweeping into your hybrid picking allows for seamless arpeggio passages and fast, fluid lines across the strings.
  • Chord embellishments: Hybrid picking can be used to add embellishments and extensions to chords, such as using the fingers to pluck additional notes while strumming with the pick.

Improving Speed and Accuracy

To enhance your hybrid picking speed and accuracy, it’s important to practice scales, arpeggios, and exercises specifically designed for this technique. Start at a slow tempo and gradually increase the speed while maintaining precision. Focus on clean and even sounding notes, ensuring that the pick and finger-plucked notes are balanced in volume and articulation.

Applying Hybrid Picking to Different Musical Styles

Hybrid picking is not limited to a specific genre. It can be applied to various musical styles, including rock, blues, jazz, country, and more. Experiment with incorporating hybrid picking into your preferred style, adapting it to suit the genre’s specific characteristics. This versatility will allow you to create your unique sound and stand out as a guitarist.

Listening and Learning from Influential Players

To further enhance your hybrid picking skills, listen to guitarists known for their proficiency in this technique. Study their playing styles and techniques, and analyze how they incorporate hybrid picking into their music. Some notable players to explore include Brent Mason, Albert Lee, Tommy Emmanuel, and Eric Johnson.

source: youtube.com/@soundguitar

Hybrid picking is a powerful technique that can greatly enhance your guitar playing. By combining the use of a pick and fingers, you can unlock a new world of musical possibilities. Dedicate time to practicing and developing your hybrid picking skills, and gradually incorporate it into your playing style. With patience, persistence, and a creative mindset, you will be able to expand your musical horizons and elevate your guitar playing to new heights with hybrid picking.

The Art of Bending and Vibrato: Mastering Expressive Techniques on the Guitar

Bending and vibrato are two essential techniques that can elevate your guitar playing from mere notes to expressive and emotive musical phrases. Whether you’re playing blues, rock, jazz, or any other genre, mastering these techniques will add depth, character, and personality to your playing. In this article, we will delve into the art of bending and vibrato, exploring their significance, techniques, and how to master them for expressive guitar playing.

Understanding Bending

Bending is the technique of altering the pitch of a note by pushing or pulling the string with your fretting hand. It creates a vocal-like effect, adding a touch of emotion and soulfulness to your playing. Bends can be full, where the note reaches a higher pitch, or half, where the note is bent slightly. Mastering bending requires control, accuracy, and a keen ear for pitch.

Bending Techniques

  1. Whole-Step Bends: These bends raise the pitch of the note by a whole step, equivalent to two frets.
  2. Half-Step Bends: These bends raise the pitch of the note by a half-step, equivalent to one fret.
  3. Pre-Bends: Pre-bending involves bending the string before picking the note, adding tension and anticipation to the sound.
  4. Release Bends: Release bends involve bending a note and then slowly releasing the bend, creating a subtle and expressive effect.
  5. Bend and Hold: This technique involves bending a note to the desired pitch and sustaining it for a specific duration.

Developing Vibrato

Vibrato is a technique that adds a pulsating, wobbling effect to a sustained note. It gives the note life and expressiveness, mimicking the natural variations in pitch produced by vocalists and other instruments. Vibrato is achieved by oscillating the string back and forth perpendicular to the fretboard using the finger pressing down the note.

Vibrato Techniques

  1. Wrist Vibrato: This technique involves using your wrist to create the vibrato motion. It allows for a wide range of speed and intensity.
  2. Finger Vibrato: Finger vibrato relies on the movement of your finger on the fret to produce the vibrato effect. It offers more control and precision but may have a narrower range of motion compared to wrist vibrato.
  3. Combination Vibrato: Some guitarists utilize a combination of wrist and finger vibrato, incorporating both techniques to achieve a unique and personalized vibrato style.

Tips for Mastery

  1. Start Slowly: Begin practicing bending and vibrato techniques at a slow tempo, focusing on accuracy and control. Gradually increase speed as you become more comfortable.
  2. Use a Tuner: Regularly check your intonation and ensure that your bent notes are in tune. A digital tuner can be a valuable tool for this purpose.
  3. Listen and Learn: Listen to recordings of guitarists known for their expressive bending and vibrato techniques. Study their phrasing, dynamics, and note choices to gain inspiration and insight.
  4. Experiment with Intensity: Explore different intensities and speeds of bends and vibrato to discover your personal style and create unique musical expressions.

Incorporating Bending and Vibrato

Once you’ve mastered bending and vibrato techniques, it’s essential to incorporate them effectively into your playing. Experiment with incorporating bends and vibrato into scales, licks, solos, and chord progressions. Focus on the emotional impact and musical context of your playing, using these techniques to express your musical ideas and connect with your audience.

source: youtube.com/@MusicisWin

Mastering the art of bending and vibrato is a significant milestone for any guitarist. These expressive techniques bring life, emotion, and character to your playing, allowing you to communicate and connect with your listeners on a deeper level. With practice, patience, and attention to detail, you can unlock the true potential of bending and vibrato, transforming your guitar playing into a captivating and expressive musical journey. So, pick up your guitar, dive into the world of bending and vibrato, and let your soul sing through your instrument.

Alternate Picking: Unlocking Speed and Precision on the Guitar

Alternate picking is a fundamental technique that every guitarist should master. It is a method of playing the guitar where you alternate between downward and upward strokes with your picking hand. By incorporating alternate picking into your playing, you can unlock greater speed, precision, and control over your guitar playing. In this article, we will explore the benefits of alternate picking and provide you with valuable tips and exercises to improve your speed and precision on the guitar.

Understanding Alternate Picking

Alternate picking involves using both downward and upward strokes with your picking hand. The goal is to maintain a consistent motion, regardless of whether you are playing a single note, a series of notes, or complex musical passages. By alternating between picking directions, you can achieve a more balanced and efficient picking technique.

Benefits of Alternate Picking

Alternate picking offers several benefits for guitarists. First and foremost, it allows for greater speed and fluidity in your playing. By evenly distributing the workload between your picking hand’s downward and upward strokes, you can execute faster note sequences with less effort. Additionally, alternate picking improves precision and control over your playing, resulting in cleaner and more articulate guitar lines.

Proper Hand and Wrist Positioning

To achieve optimal alternate picking, it’s essential to maintain proper hand and wrist positioning. Ensure that your picking hand is relaxed and slightly angled towards the strings. Keep your wrist straight and avoid excessive tension. This will allow for smoother and more fluid picking motion.

Start Slow and Gradually Increase Speed

When practicing alternate picking, it is crucial to start slowly and gradually increase your speed over time. Begin by playing simple exercises or scales at a tempo where you can execute each stroke cleanly. As you build confidence and accuracy, gradually increase the speed while maintaining control. It is better to practice at a slower tempo with precision than to rush through exercises with sloppy technique.

Focus on Consistent Timing and Rhythm

Alternate picking is not just about speed; it’s also about maintaining consistent timing and rhythm. Pay attention to the subdivision of the beats and practice with a metronome to develop a strong sense of timing. This will help you stay in sync with the music and execute precise and even strokes.

Utilize Economy of Motion

To maximize efficiency in your alternate picking technique, strive for economy of motion. Minimize excess movements by keeping your pick strokes short and precise. Avoid unnecessary hand or arm motions that can slow you down or introduce tension. The goal is to develop a smooth and fluid picking motion with minimal wasted energy.

Incorporate String Skipping and String Crossing

To further enhance your alternate picking skills, incorporate exercises that involve string skipping and string crossing. These exercises challenge your picking accuracy and coordination. Start with simple patterns and gradually increase the difficulty as you become more comfortable. Practice both ascending and descending patterns to develop equal proficiency in both directions.

Practice Patterns and Exercises

Dedicate regular practice sessions to specific alternate picking patterns and exercises. Focus on sequences that target your weak areas or specific techniques you want to improve. Work on scales, arpeggios, and licks that require alternate picking. Gradually increase the complexity of the patterns and incorporate them into your improvisation or repertoire.

Transcribe and Study Alternate Picking Solos

Transcribing and studying solos by guitarists known for their alternate picking skills can be beneficial in improving your own technique. Choose solos by players such as Yngwie Malmsteen, Paul Gilbert, or John Petrucci, and analyze their picking approach. Pay attention to their hand position, picking angles, and note choices. Transcribe and practice their solos to develop your speed, accuracy, and overall alternate picking proficiency.

Record and Evaluate Your Progress

Recording yourself while practicing alternate picking exercises and solos can provide valuable feedback for improvement. Listen back to your recordings and assess your technique, timing, and overall sound. Identify areas that need work and make adjustments accordingly. Recording yourself also allows you to track your progress over time, which can be motivating and rewarding.

source: youtube.com/@licklibrary

Alternate picking is a crucial technique for guitarists seeking to improve their speed, precision, and control. By incorporating the tips and exercises outlined in this article into your practice routine, you can unlock the full potential of alternate picking on the guitar. Remember to start slowly, focus on accuracy and timing, and gradually increase your speed over time. With dedication and consistent practice, you will experience significant improvements in your alternate picking skills, opening up new possibilities for your guitar playing.

Conquering the Sweep: Must-Know Songs for Sweep Picking Enthusiasts

Sweep picking is a guitar technique that allows players to execute fast and fluid arpeggios by sweeping their pick across the strings. It’s a challenging technique that requires precision, coordination, and control. One of the best ways to master sweep picking is to study and learn songs that showcase this technique. In this article, we will explore a selection of must-know songs for sweep picking enthusiasts that will help you develop and conquer this impressive technique.

“Eruption” by Van Halen

Considered one of the most iconic guitar solos of all time, “Eruption” by Van Halen features a blistering sweep-picked arpeggio section. Eddie Van Halen’s fast and precise sweeping in this song has inspired countless guitarists. Learning and mastering the sweep-picked arpeggio section in “Eruption” will significantly improve your sweep picking skills.

“Technical Difficulties” by Racer X

Paul Gilbert, known for his lightning-fast playing and impeccable technique, showcases his sweep picking prowess in the instrumental song “Technical Difficulties.” This song includes intricate sweep-picked arpeggios and challenging string skipping patterns that will put your skills to the test.

“Altitudes” by Jason Becker

“Altitudes” is an awe-inspiring composition by the virtuoso guitarist Jason Becker. This instrumental masterpiece contains beautiful and complex sweep-picked arpeggios that require both speed and accuracy. Learning and performing the sweeping sections of this song will undoubtedly enhance your sweep picking technique.

“Scarified” by Racer X

Another masterpiece by Racer X, “Scarified” features lightning-fast sweep-picked arpeggios and intricate string skipping passages. The song showcases the incredible sweep picking abilities of Paul Gilbert and serves as a fantastic study for aspiring sweep pickers.

“Far Beyond the Sun” by Yngwie Malmsteen

Yngwie Malmsteen is known for his blazing speed and virtuosic sweep picking. “Far Beyond the Sun” is a classic example of his sweep-picking prowess, with fast and precise arpeggios executed flawlessly. Learning this song will not only improve your sweep picking technique but also expose you to Malmsteen’s unique neo-classical style.

“The Glass Prison” by Dream Theater

“The Glass Prison” is a progressive metal masterpiece by Dream Theater, featuring John Petrucci’s impressive sweep picking skills. This song contains sections with intricate sweep-picked arpeggios that require both accuracy and speed. Studying and mastering these sections will elevate your sweep picking abilities.

“Serrana” by Jason Becker

“Serrana” is a beautiful instrumental composition by Jason Becker, showcasing his incredible musicianship and sweep picking skills. The song features intricate and melodic sweep-picked arpeggios that demonstrate the expressive potential of this technique.

“Selkies: The Endless Obsession” by Between the Buried and Me

Between the Buried and Me incorporates sweep picking into their progressive metal sound. “Selkies: The Endless Obsession” features challenging sweep-picked arpeggios and intricate musical passages that will test your technique and musicality.

“Crystal Planet” by Joe Satriani

Joe Satriani’s “Crystal Planet” showcases his melodic sweep-picking abilities. The song features beautiful and memorable sweep-picked arpeggios that are harmonically rich and musically captivating.

“Technical Difficulties” by Paul Gilbert

Paul Gilbert’s “Technical Difficulties” (not to be confused with the Racer X song of the same name) is a captivating instrumental piece that incorporates mesmerizing sweep-picked arpeggios. Learning this song will challenge your technique and expand your sweep picking capabilities.

source: youtube.com/@Brootalboo

When learning these songs, take them slowly at first, breaking down the arpeggios into smaller sections and gradually increasing the tempo as you become comfortable. Focus on maintaining clean and precise picking motion, muting unwanted strings, and ensuring each note rings out clearly.

Remember that while learning and mastering these songs is important, it’s equally crucial to incorporate the techniques and concepts you learn into your own playing and musical style. Use these songs as a source of inspiration and a framework for your own creative exploration.

By studying and practicing these must-know songs for sweep picking enthusiasts, you’ll develop your technique, expand your musical vocabulary, and unlock new possibilities for expressing yourself on the guitar. Embrace the challenge, stay dedicated to your practice, and conquer the sweep!